
| TTN version: | TTNv3 |
| Board: | Adafruit Feather M0 |
| Activation: | OTAA |
| Device Class: | Class A |
| Last updated: | October 7, 2023 |
This article provides instructions for making a temperature, humidity and pressure sensor using Adafruit Feather M0 RFM95 LoRa Radio and BME280. If you haven’t set up Adafruit Feather M0 yet, check out our Adafruit Feather M0 tutorial (Activation – OTAA).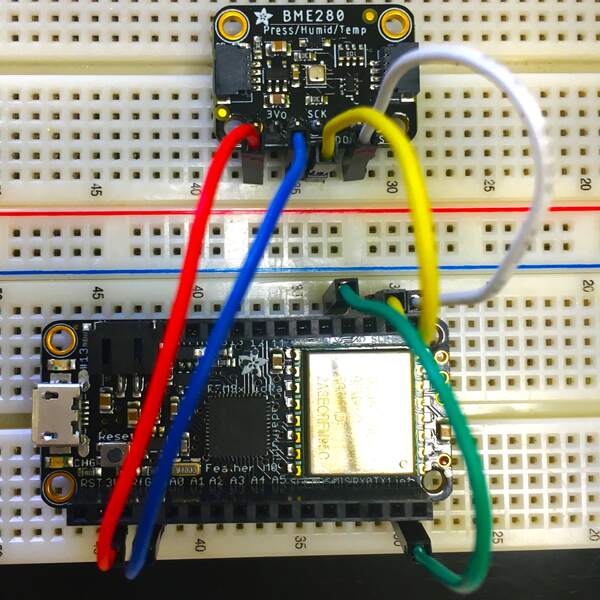
Prepare
- Adafruit Feather M0 RFM95 LoRa Radio
- BME280
- 5x wire
- breadboard (optional)
- PC + micro USB cable
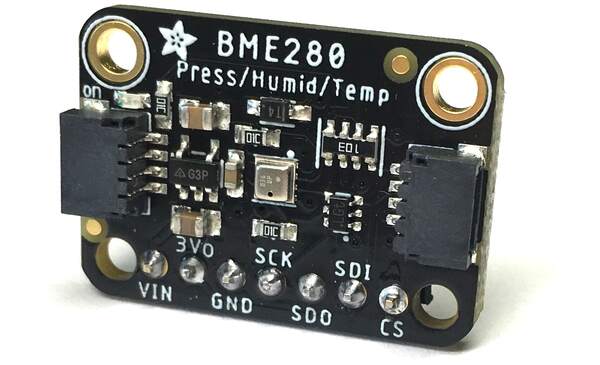
BME280
To measure temperature, humidity and pressure, we will use the BME280 sensor. The sensor measures temperatures in the range of -40 °C to 85 °C, humidity in the range of 0 % to 100 % and pressure in the range of 300 hPa to 1100 hPa. The accuracy of temperature measurement is ± 1.0 ºC, humidity ± 3 % and pressure ±1 hPa.
Sensor assembly
Connect everything according to the schematics bellow.
Wire up the Adafruit Feather M0’s IO1 pin with pin 6. The sensor is connected using four pins. The BME280 pin VIN is connected to the supply voltage (3V pin on Adafruit Feather M0), the BME280 pin GND is connected to the ground (GND pin on Feather), the BME280 pin SCK is connected to Feather’s pin SCL and the BME280 pin SDI is connected to Feather’s pin SDA. The sensor requires a stabilized supply voltage in the range of 3.3 V to 5 V for its function.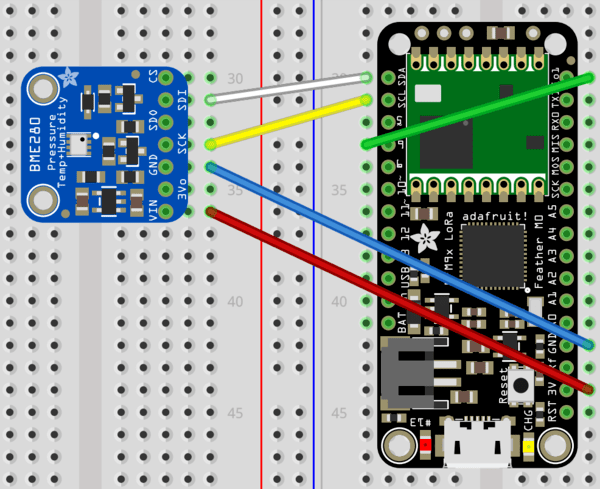
Arduino IDE setup
- Run Arduino IDE.
- In the Arduino IDE Library Manager search Adafruit BME280 Library by Adafruit and install it with all dependencies (library Adafruit Unified Sensor and Adafruit BusIO).
- In the Arduino IDE Library Manager search CayenneLPP by Electronic Cats and install it.
- In the Arduino IDE Library Manager search RTCZero by Arduino and install it.
Printing measured values to Serial Monitor
- In the Arduino IDE File -> Examples -> Adafruit BME280 Library -> open bme280test
- Connect Adafruit Feather M0 using micro USB cable to your computer.
- In Arduino IDE click on Upload button to upload program to your Adafruit Feather M0.
- In Arduino IDE click on Serial Monitor button and you should every second see this:

Sending measured values to TTS
We have prepared four programs for measuring temperature, humidity and pressure. The first program sends the current measured values. The second program sends averages of measured values over a certain period of time. The other two programs extend the first two with a low power mode, which is great when you run this sensor on battery power.
Programs
- Current measured values
- Averages of measured values
- Current measured values with low power mode
- Averages of measured values with low power mode
Instructions
- Copy and paste one of this programs to your Arduino IDE.
- In program replace APPEUI, DEVEUI and APPKEY with keys in TTS. Keys are in TTS -> Applications -> YourAppName -> YourEndDeviceName -> Overview -> Activation information.
- In TTS -> Applications -> YourAppName -> YourEndDeviceName -> Payload formatters -> Uplink change Formatter type to CayenneLPP. For more information, check out our Cayenne LPP tutorial.
- Save changes.
- Connect Adafruit Feather M0 using micro USB cable to your computer.
- In Arduino IDE click on Upload button to upload program to your Adafruit Feather M0.
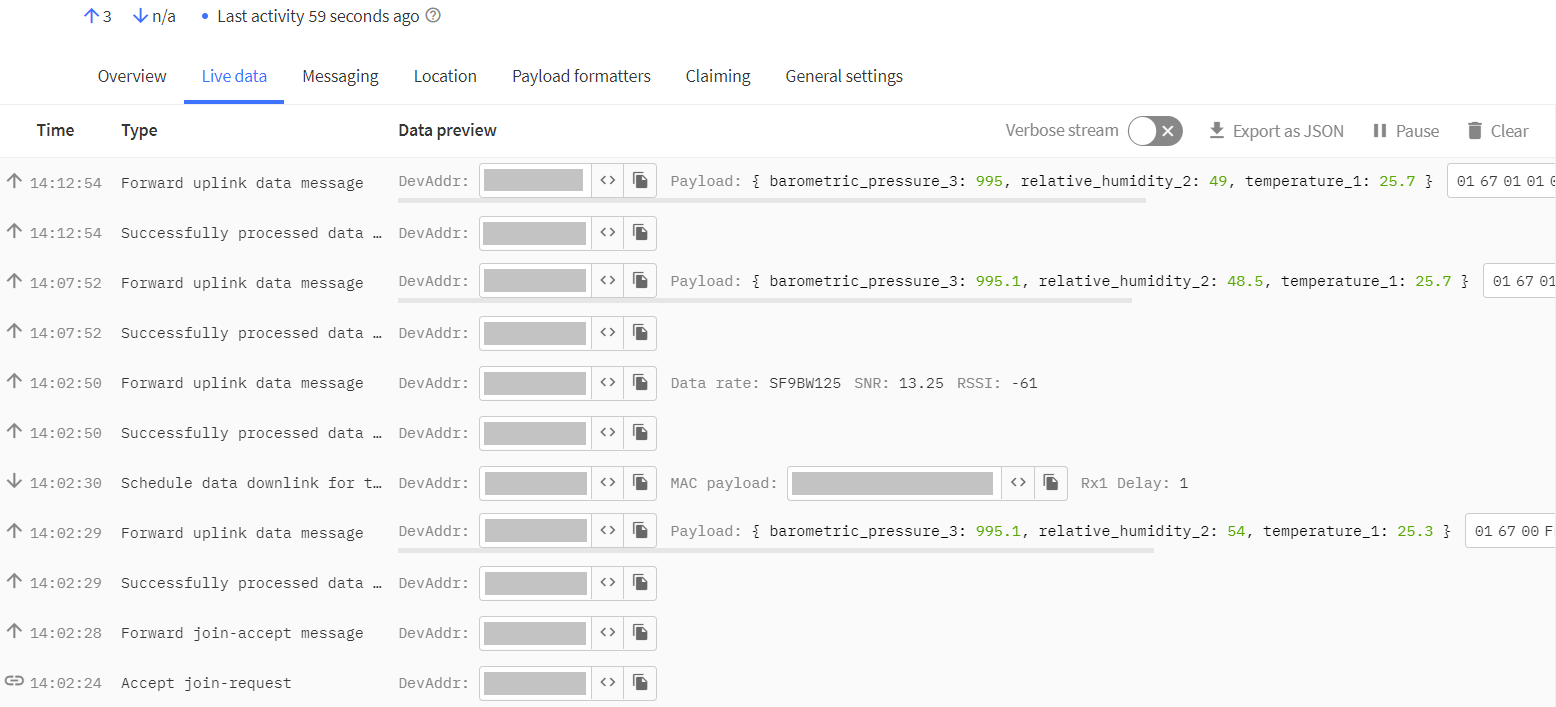
- In TTS -> Applications -> YourAppName -> YourEndDeviceName -> Live data you should every 5 minutes (Low Power Mode – 10 minutes) see this:
Data visualization
If you want to visualize your measured data, continue with the following tutorial: