| TTN version: | TTNv3 / TTS SANDBOX |
| Activation: | ABP |
| Device Class: | Class A |
| Last revision: | October 28, 2024 |
At the Feather 32u4‘s heart is at ATmega32u4 clocked at 8 MHz and at 3.3V logic. Feather 32u4 LoRa Radio uses the extra space left over to add an RFM9x LoRa 868/915 MHz radio module. We use 868 MHz one. See complete specification here.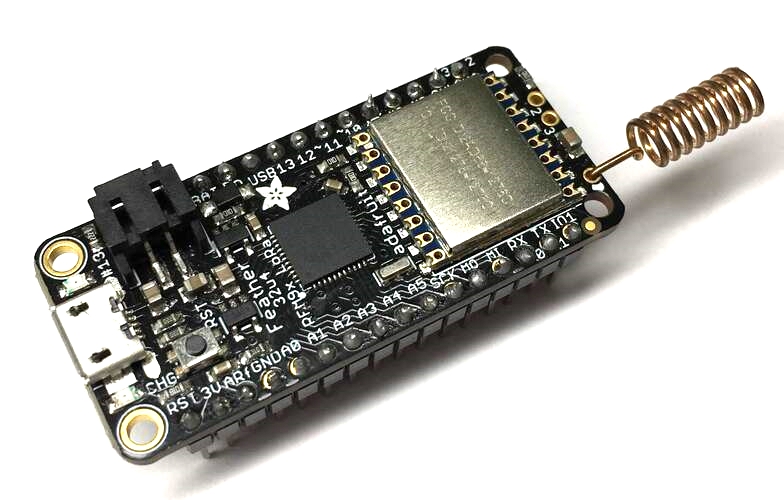
Prepare
- Adafruit Feather 32u4 RFM95 LoRa Radio
- 1x wire
- breadboard (optional)
- PC + micro USB cable
Arduino IDE setup
- Download Arduino IDE.
- Run Arduino IDE.
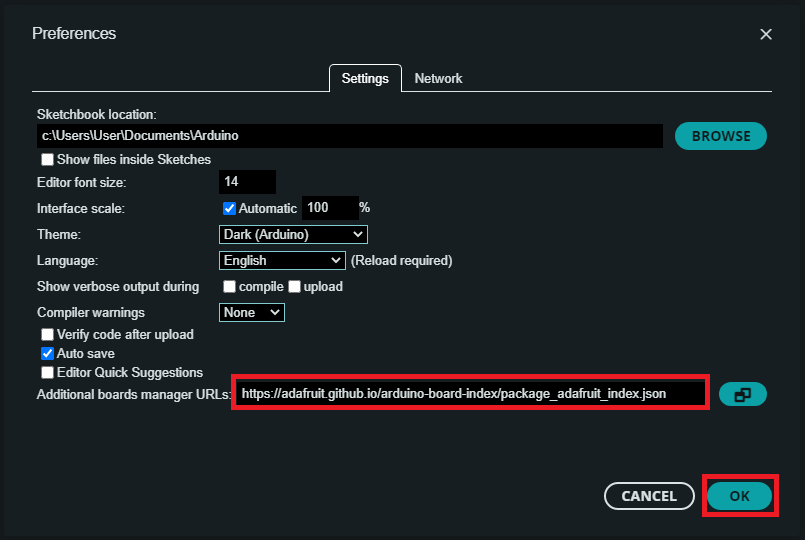
- In the Arduino IDE File -> Preferences copy and paste the link below into the Additional Boards Manager URLs.
https://adafruit.github.io/arduino-board-index/package_adafruit_index.json - Click OK.
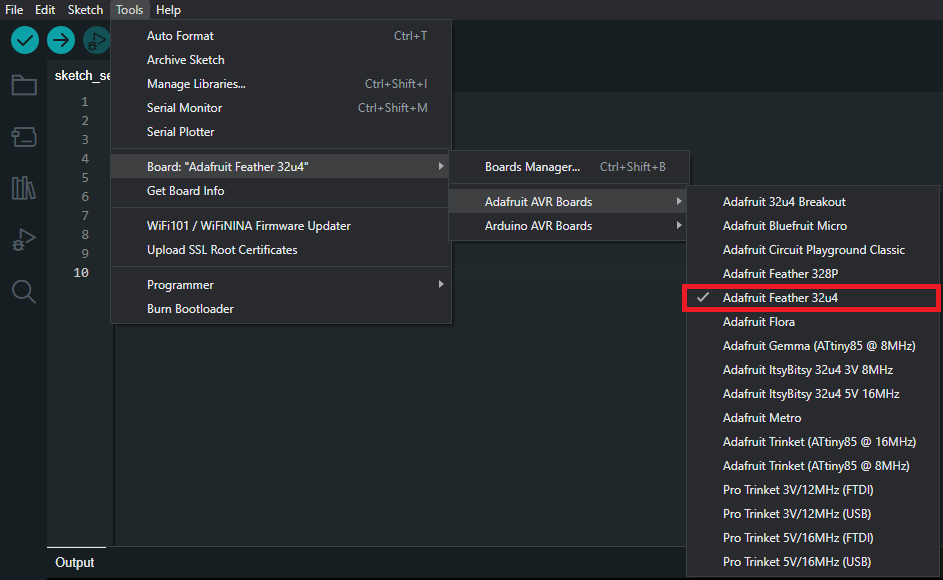
- Install the Adafruit boards via Boards Manager -> search Adafruit AVR Boards -> Install.
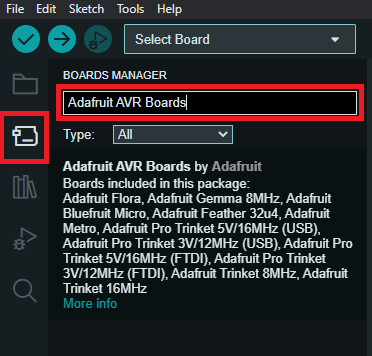
- You should see in Tools -> Board -> Adafruit AVR Boards the Adafruit Feather 32u4.
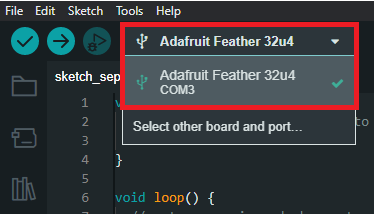
- Connect Adafruit Feather 32u4 using micro USB cable to your computer.
- Choose the appropriate COM port which is used for communication with Adafruit.
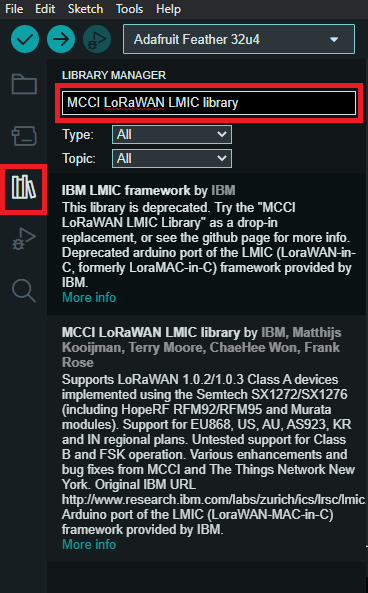
MCCI LoRaWAN LMIC library setup
- In the Arduino IDE Library Manager search MCCI LoRaWAN LMIC library by Terry Moore and install it.
ABP configuration for Adafruit Feather 32u4
- On Windows open lmic_project_config.h located in \Documents\Arduino\libraries\MCCI_LoRaWAN_LMIC_library\project_config\
- Change project definitions to definitions listed bellow and save it:
// project-specific definitions
#define CFG_eu868 1                  //for Europe (change it based on your location)
#define CFG_sx1276_radio 1
#define DISABLE_JOIN 1
#define DISABLE_PING 1
#define DISABLE_BEACONS 1
#define DISABLE_MCMD_DlChannelReq 1
Add Adafruit Feather 32u4 into The Things Stack
- Create an account on The Things Network if you don’t have one.
- Login on The Things Network.
- Click on your username and choose Console.
- Select a network cluster .
Add application
- Go to applications.
- Click on button + Add application.
- Write something into Application ID.
- Click on button Create application.
Add end device
- In your application click on button + Register end device.
- Input Method – Choose Enter end device specifics manually.
- Frequency plan – Europe 863-870 MHz (SF9 for RX2 – recommended)
- LoRaWAN version – LoRaWAN Specification 1.0.3
- Click on Show advanced activation, LoRaWAN class and cluster settings
- Activation mode – Activation by personalization (ABP)
- Additional LoRaWAN class capabilities – None (class A only)
- Deselect – Use network’s default MAC settings
- Rx1 data rate offset = 0
- Rx1 delay = 1
- Resets frame counters – Enabled
- Rx2 data rate = 3
- Rx2 frequency = 869,525 MHz
- Add entry = 868100000
- Add entry = 868300000
- Add entry = 868500000
- Add entry = 867100000
- Add entry = 867300000
- Add entry = 867500000
- Add entry = 867700000
- Add entry = 867900000
- DevEUI – Generate
- Device address – Generate
- AppSKey – Generate
- NwkSKey – Generate
- End device ID – here you can name your device
- After registration – View registered end device
- Click on button Register end device
- Click on Settings
- Network layer – Expand
- Click on Advanced MAC settings
- Desired Rx1 delay = 1
- Adaptive data rate (ADR) – Dynamic mode
- Click on button Save changes
Sending “Hello LoRa!” to TTS
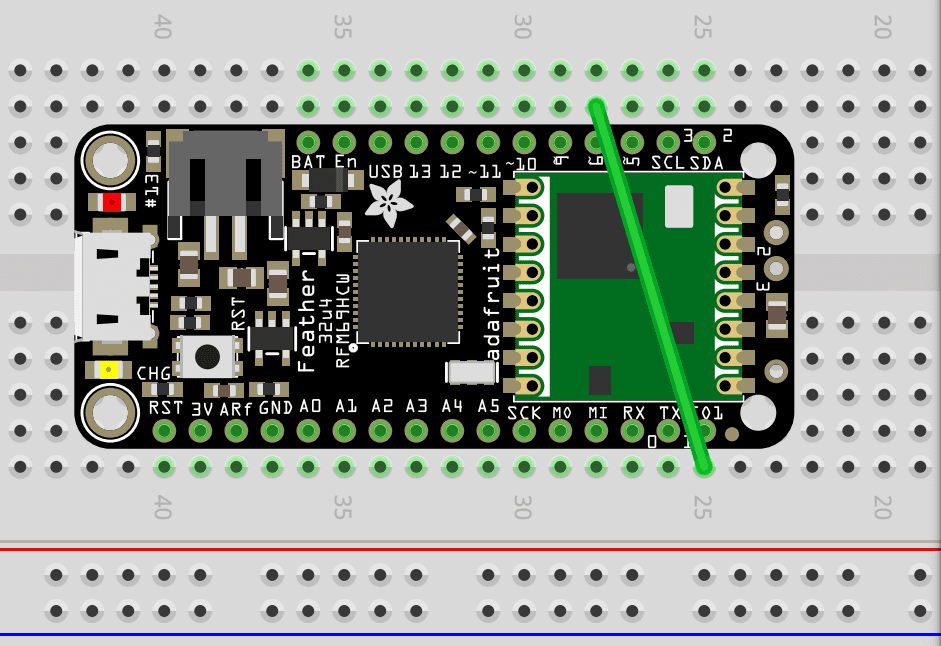
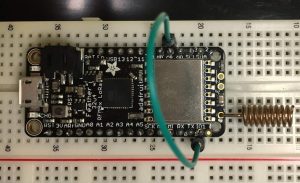
- First of all wire up the board’s IO1 pin with pin 6.
- In TTS -> Applications -> YourAppName -> YourEndDeviceName -> Payload formatters -> Uplink change Formatter type to Custom Javascript formatter and to Formatter code copy and paste code bellow:
function Decoder(bytes, port) {
   return {
          mydata: String.fromCharCode.apply(null, bytes) // Decode plain text
   };
}
- Save changes
- To your Arduino IDE copy and paste program Sending Hello LoRa.
- In program replace NWKSKEY, APPSKEY and DEVADDR with keys of your end device registred in TTS. Keys are in TTS -> Applications -> YourAppName -> YourEndDeviceName -> Device overview -> Session information.
- Connect Adafruit Feather 32u4 using micro USB cable to your computer.
- Choose the appropriate COM port which is used for communication with Adafruit.
- In Arduino IDE click on Upload button to upload program to your Adafruit Feather 32u4.
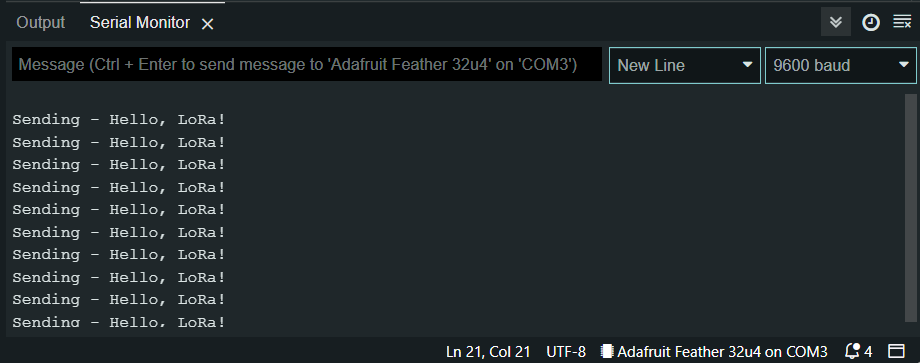
- In Arduino IDE click on Serial Monitor button and you should every +-1 minute see “Sending – Hello, LoRa!”:
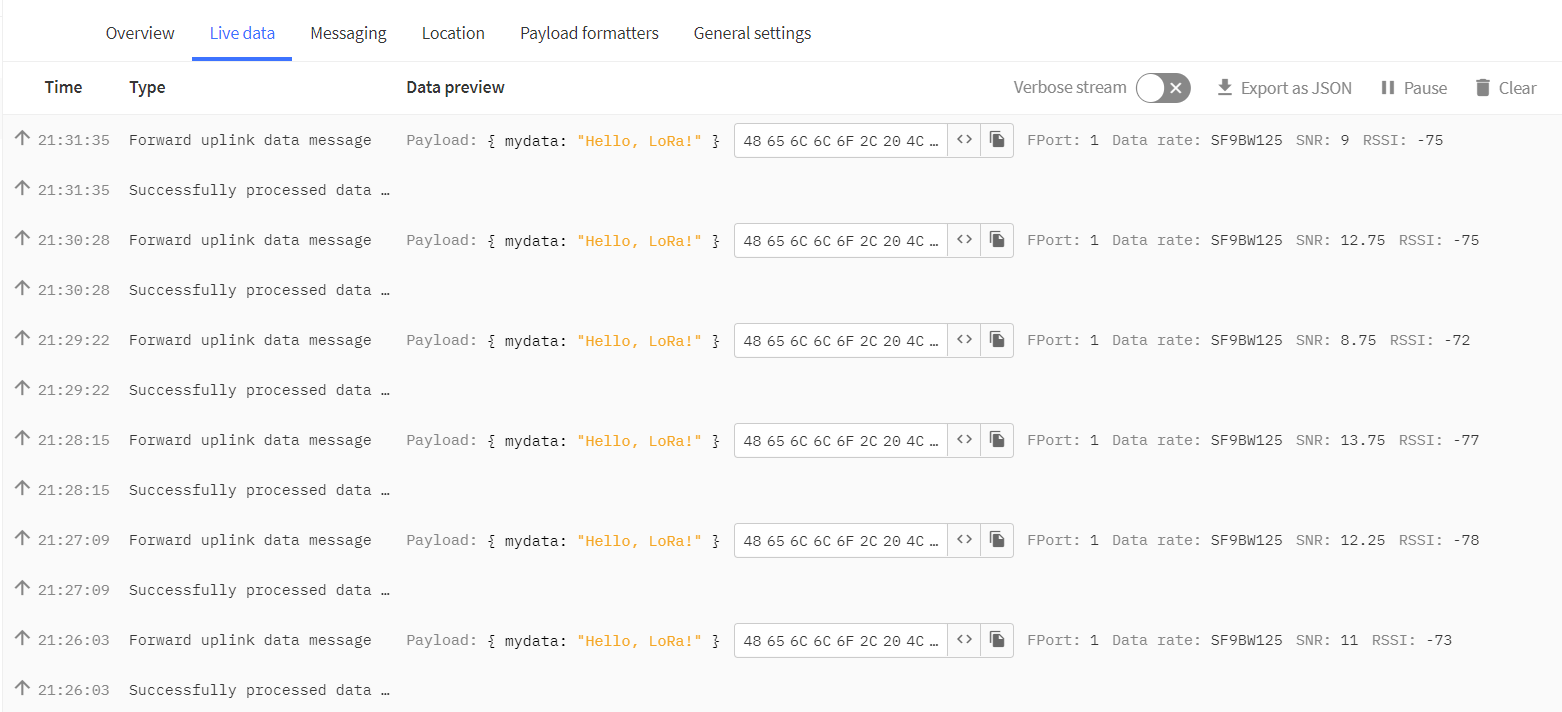
- In TTS -> Applications -> YourAppName -> YourEndDeviceName -> Live data you should see this: