
| TTN version: | TTNv3 |
| Frequency: | Europe 863-870 MHz (SF9 for RX2 – recommended) |
| Classes: | Ready for LoRaWAN Classes A, B and C |
| Using Docker: | Yes |
| Last updated: | August 2, 2025 |
This article provides instructions for making LoRa Basics Station using Raspberry Pi 3 or 4, iC880A-SPI LoRa Concentrator and GPS NEO-6M GYNEO6MV2.
Note: A GPS module with PPS (Pulse Per Second) is required to support class B end devices.
Prepare
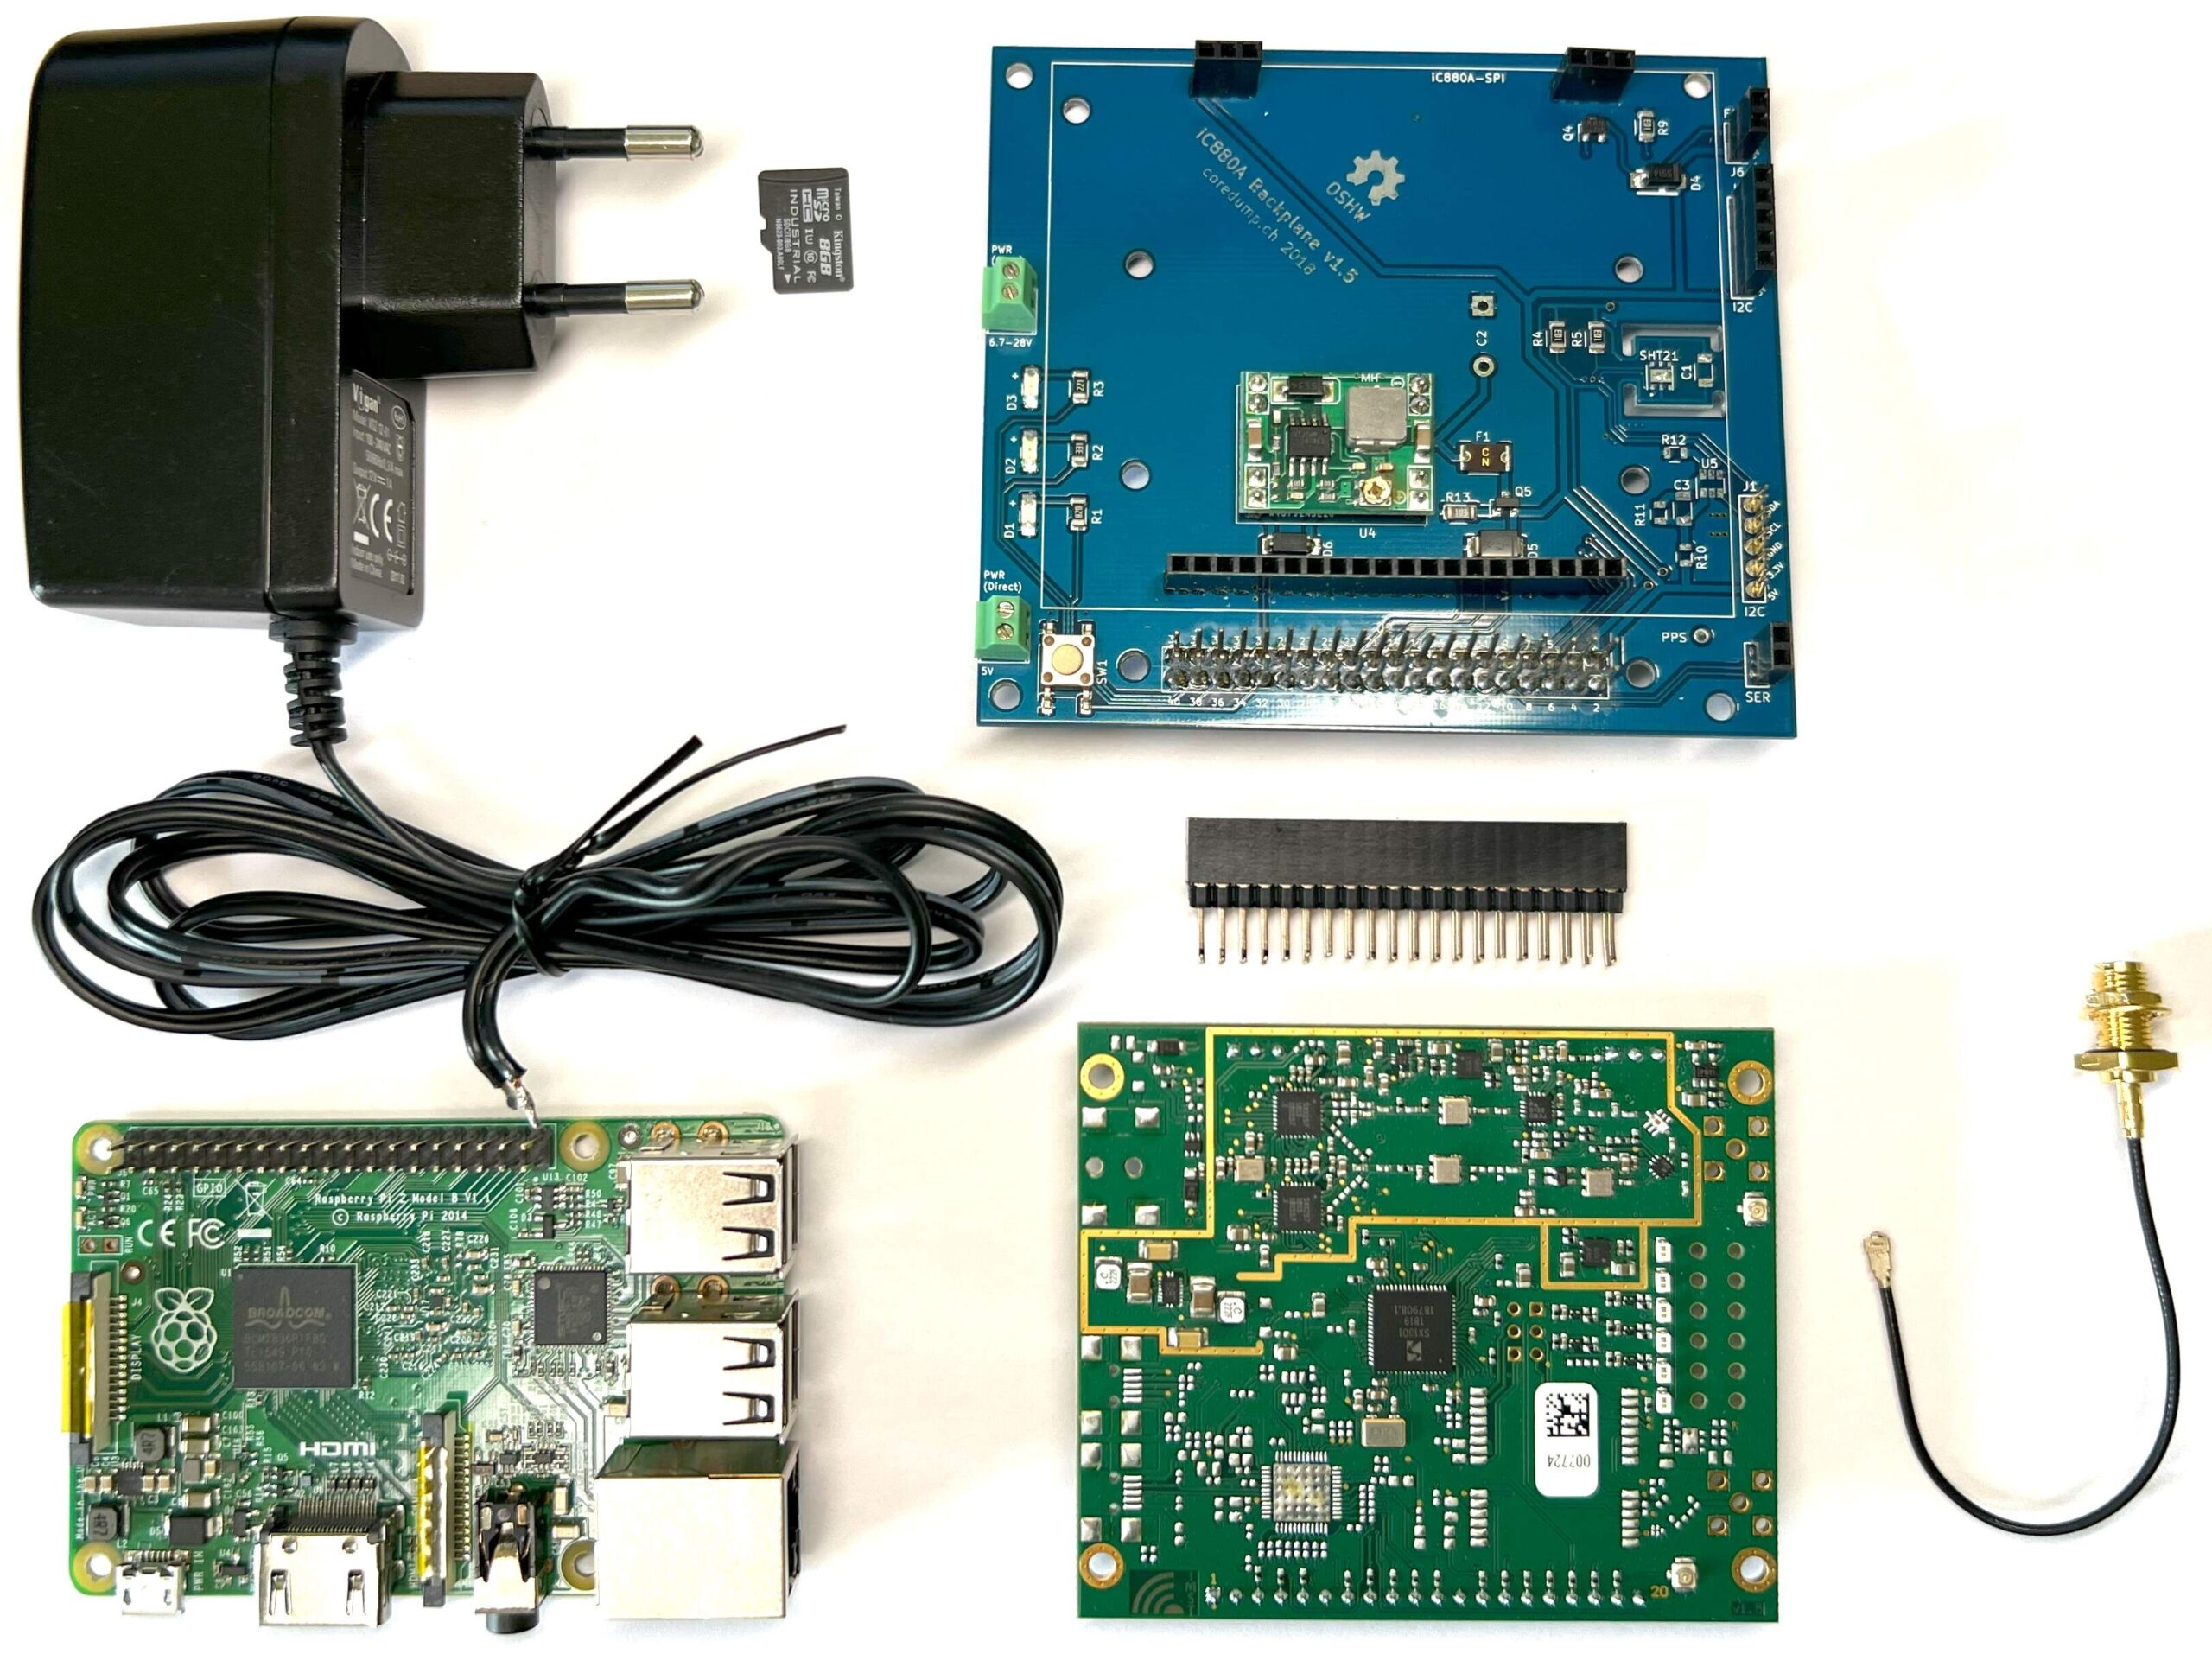
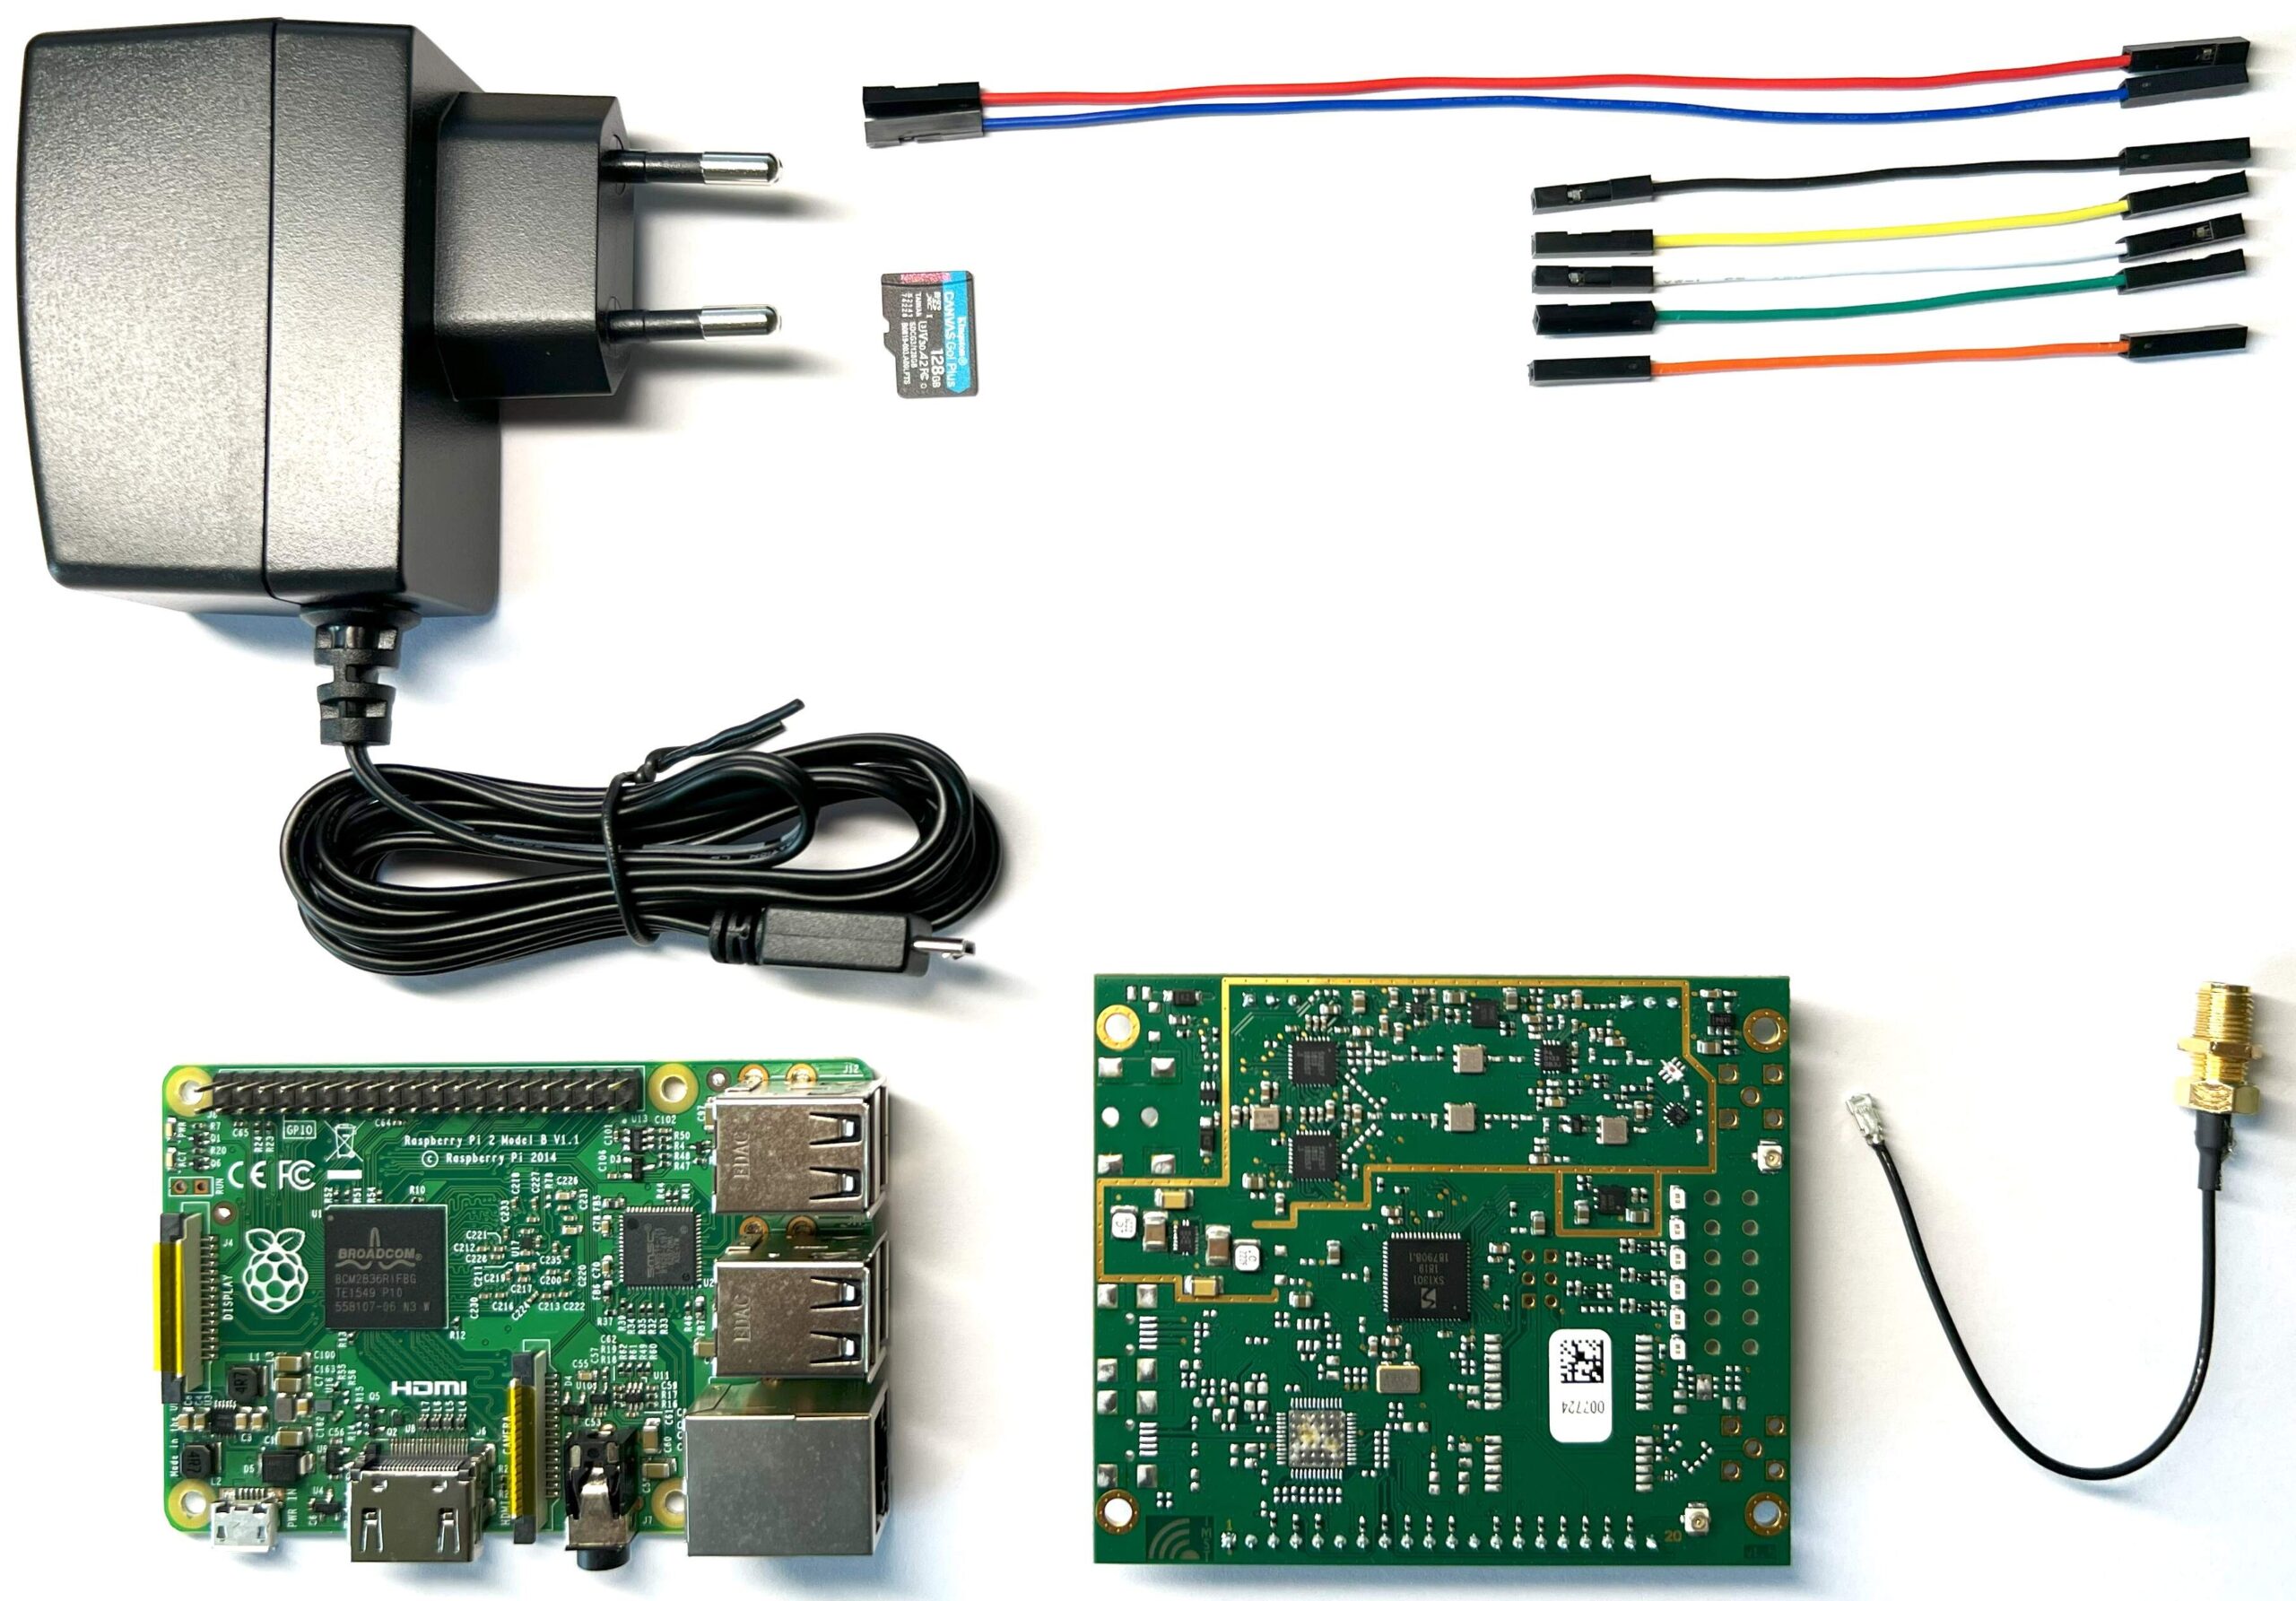
There are several ways to build a LoRa Basics Station. We have chosen two that we use, so here are two component lists.
Assembly 1
- Raspberry Pi 3 or 4
- Power Supply
- microSD card
- iC880A-SPI LoRa Concentrator
- iC880A Backplane v1.5 (coredump.ch 2018)
- GPS NEO-6M GYNEO6MV2
- GPS antenna
- Stacking Header for Pi A+/B+/Pi 2/Pi 3 – 2×20 Extra Tall Header
- 2x SMA to uFL/u.FL/IPX/IPEX RF Adapter Cable
- 5x jumper wire
- PC
Assembly 2
- Raspberry Pi 3 or 4
- Raspberry Pi Power Supply
- microSD card
- iC880A-SPI LoRa Concentrator
- GPS NEO-6M GYNEO6MV2
- GPS antenna
- 12x jumper wire
- 2x SMA to uFL/u.FL/IPX/IPEX RF Adapter Cable
- 3D printed holder to mount boards
- screws
- PC
iC880A-SPI LoRa Concentrator
The concentrator module iC880A is targeted for a huge variety of applications like Smart Metering, IoT and M2M applications. This concentrator module can be integrated into a gateway as a complete RF front end. It provides the possibility to enable robust communication between a LoRa gateway and a huge amount of LoRa end-nodes spread over a wide range of distance.
The iC880A is able to receive up to 8 LoRa packets simultaneously sent with different spreading factors and also on different channels. This unique capability allows to implement innovative network architectures advantageous over other short range systems.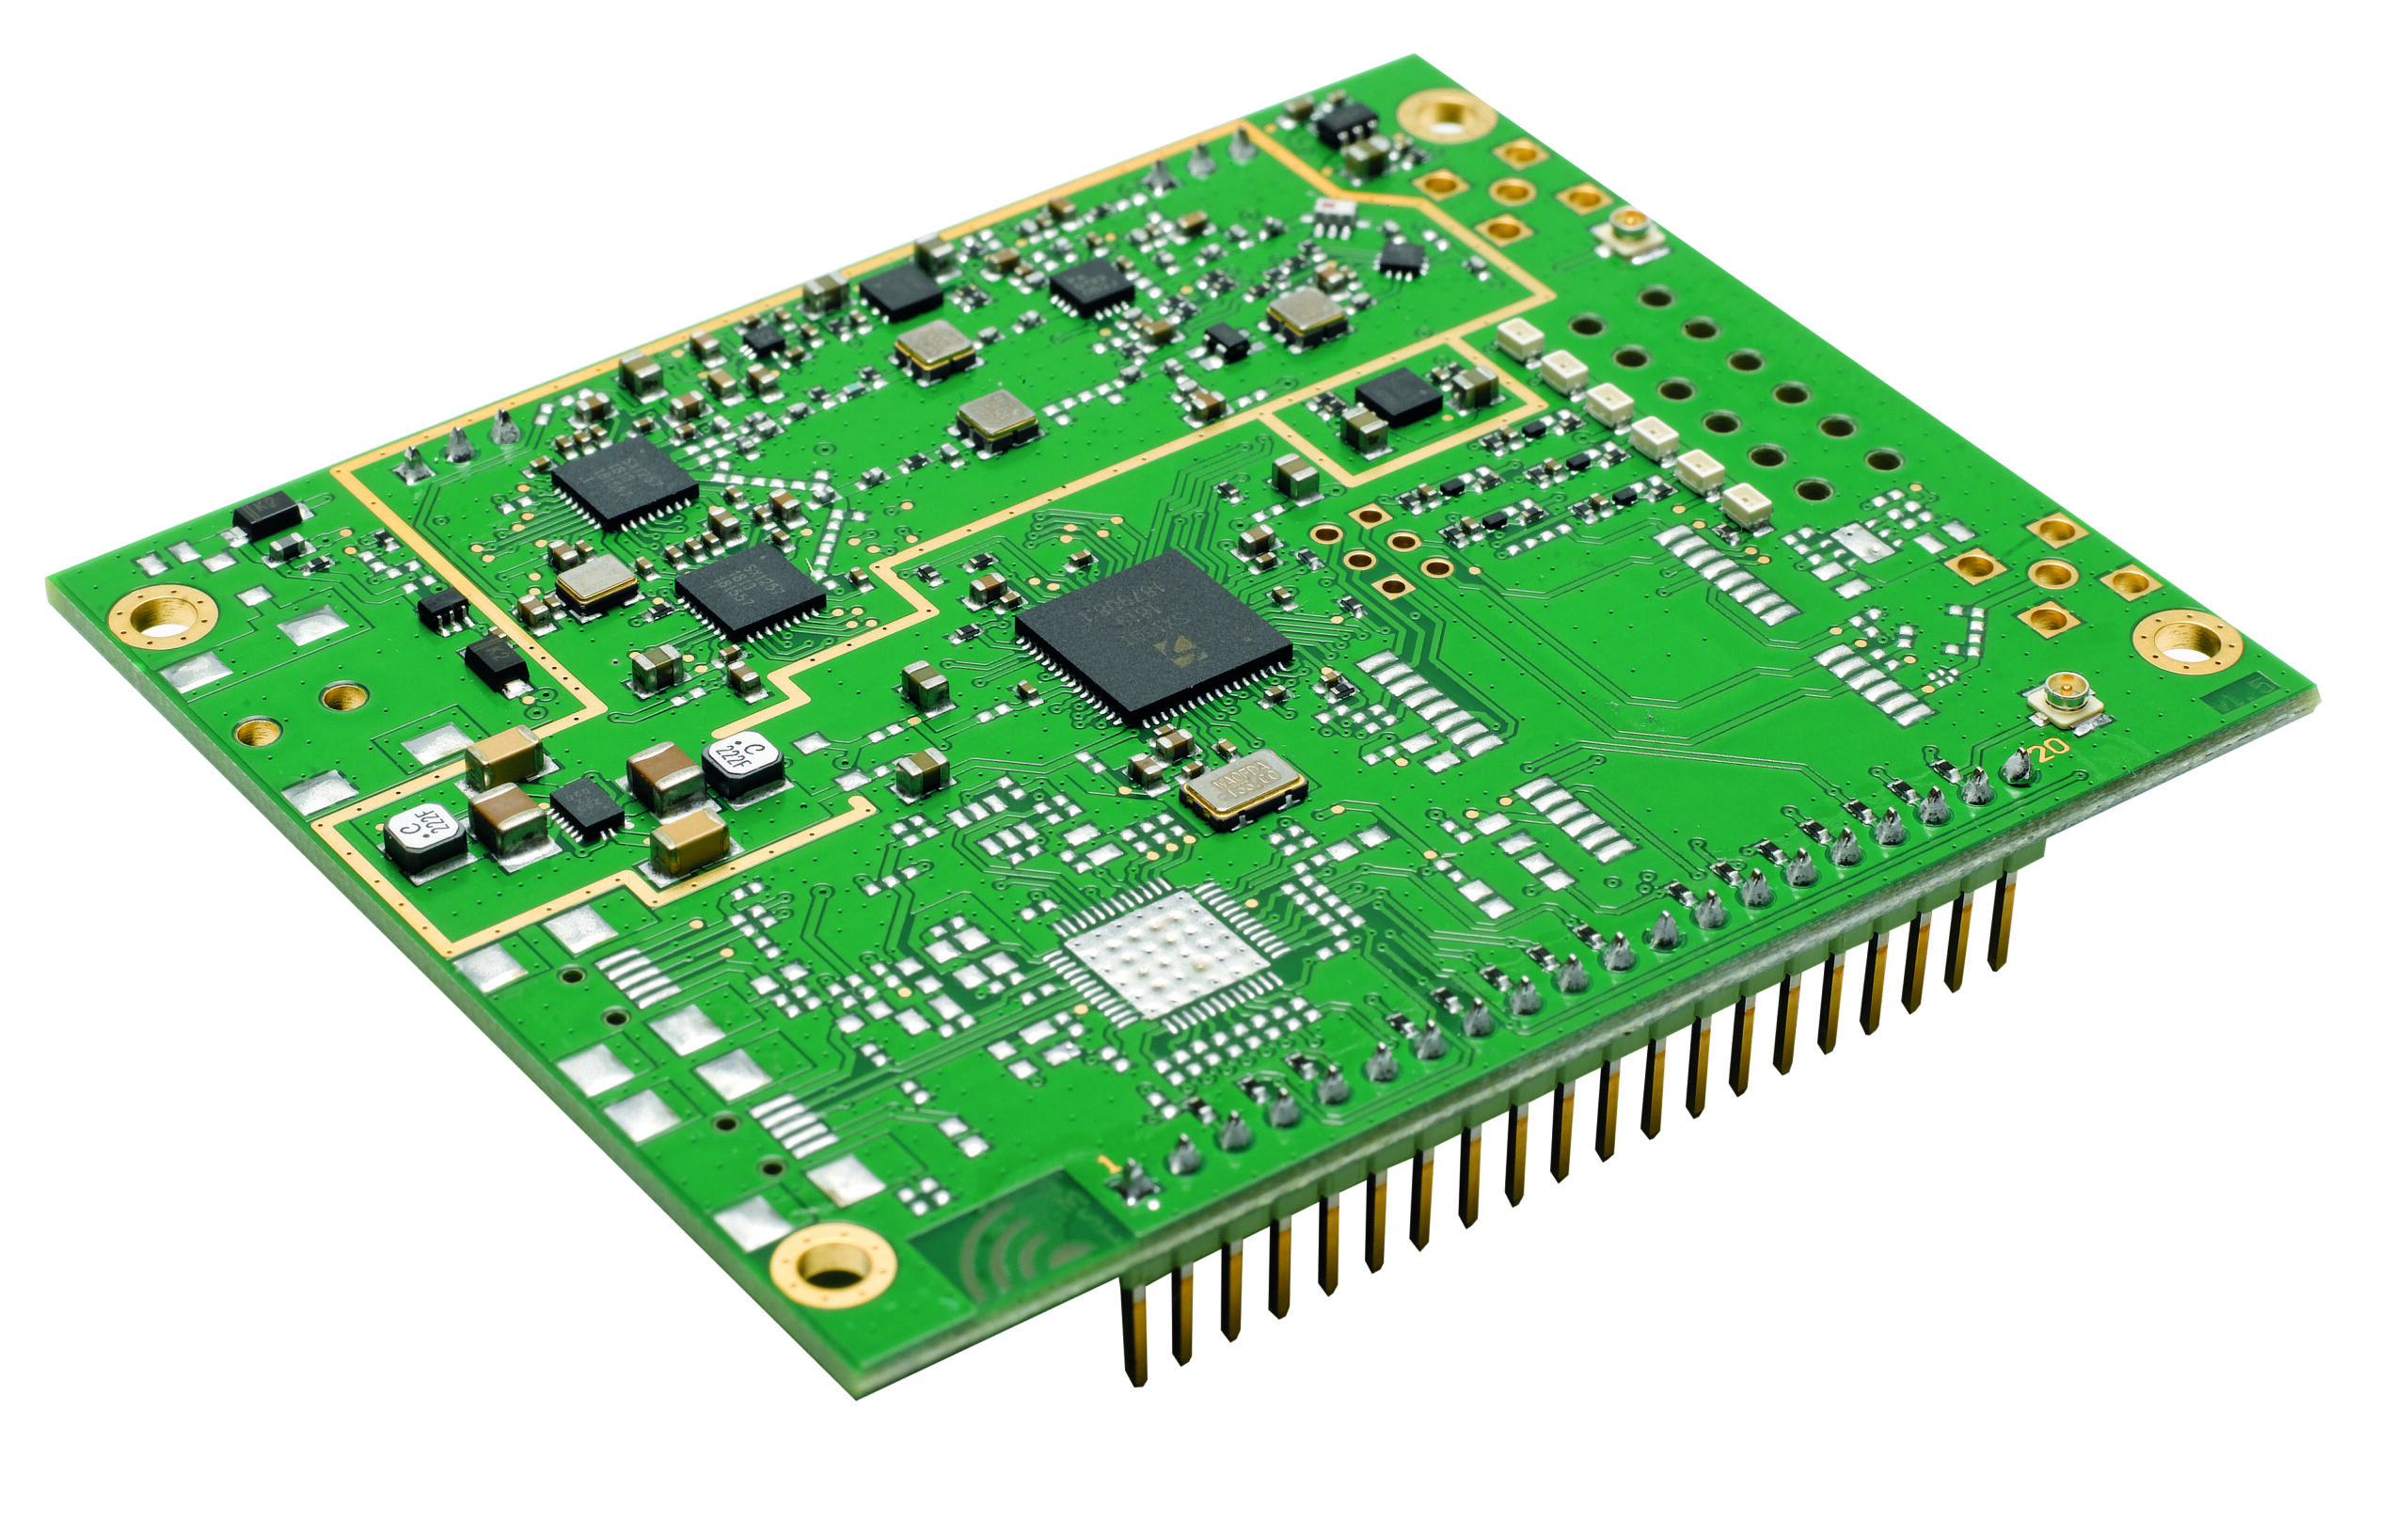
For more information on iC880A-SPI LoRa Concentrator, see:
Assembly
Assembly 1
- Prepare all the components.
- Insert the iC880A-SPI LoRa Concentrator module into the iC880A Backplane v1.5.
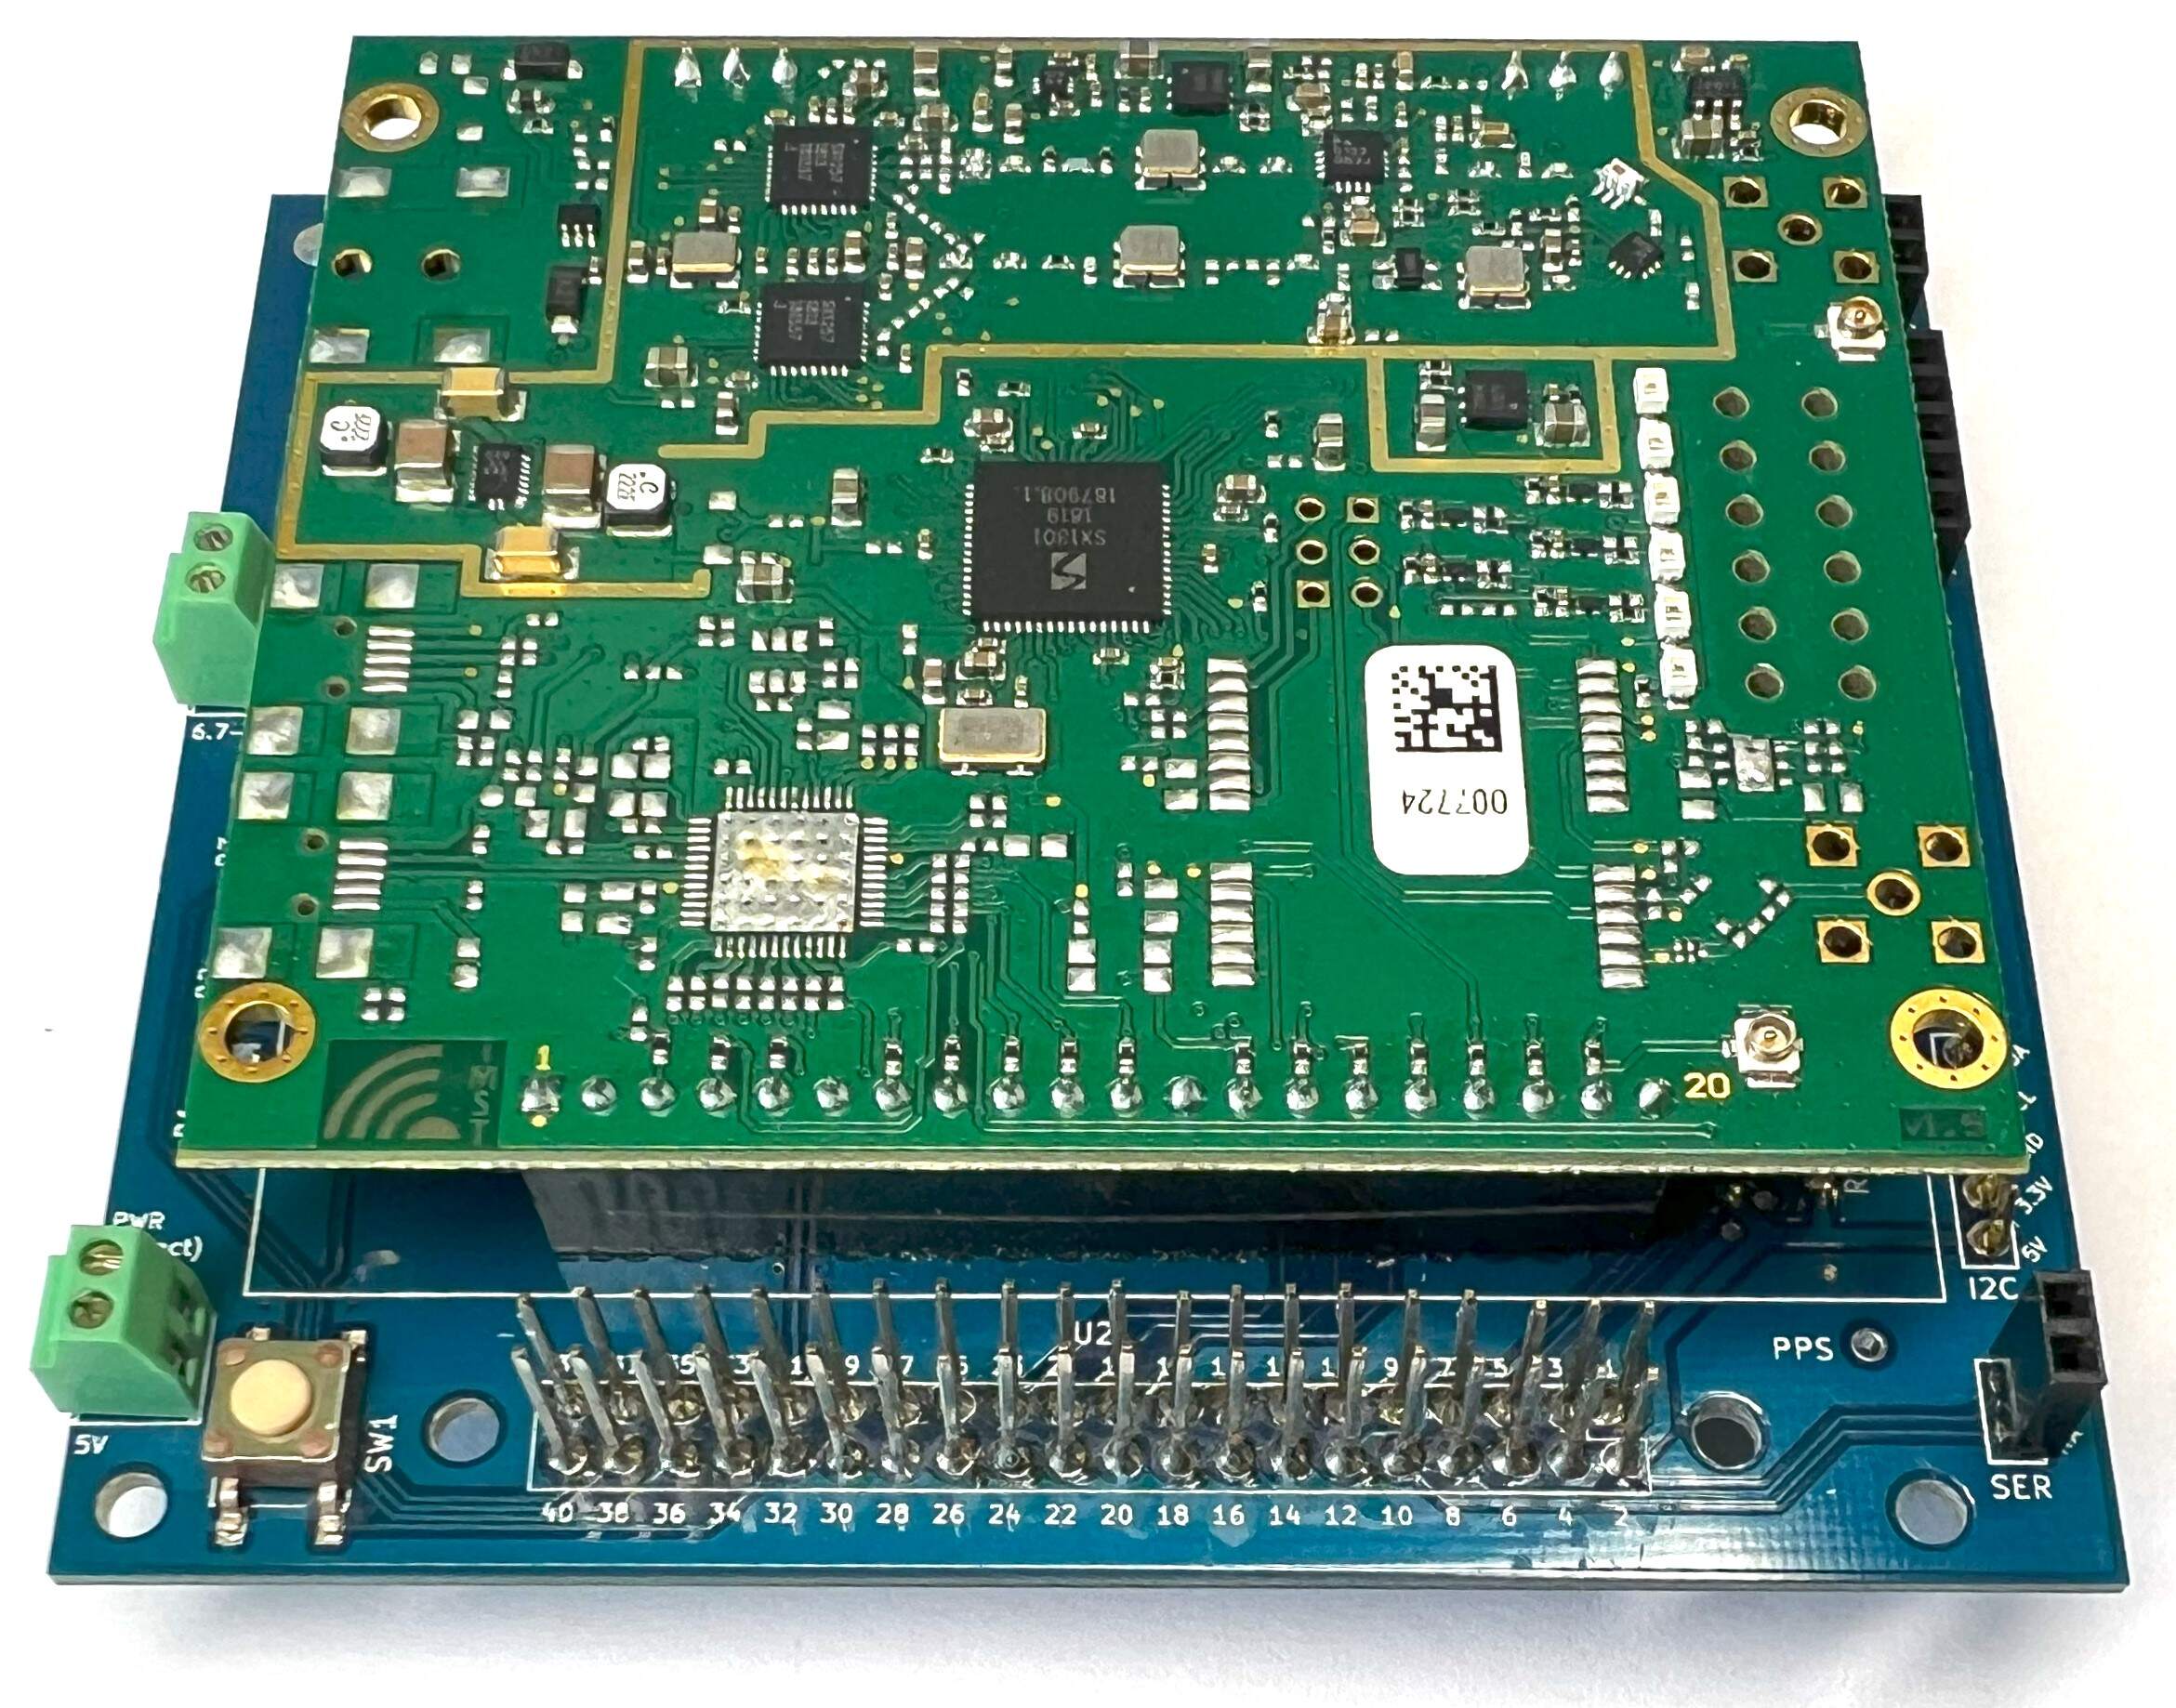
- Connect the Stacking Header for Pi to the GPIO on the Raspberry Pi.
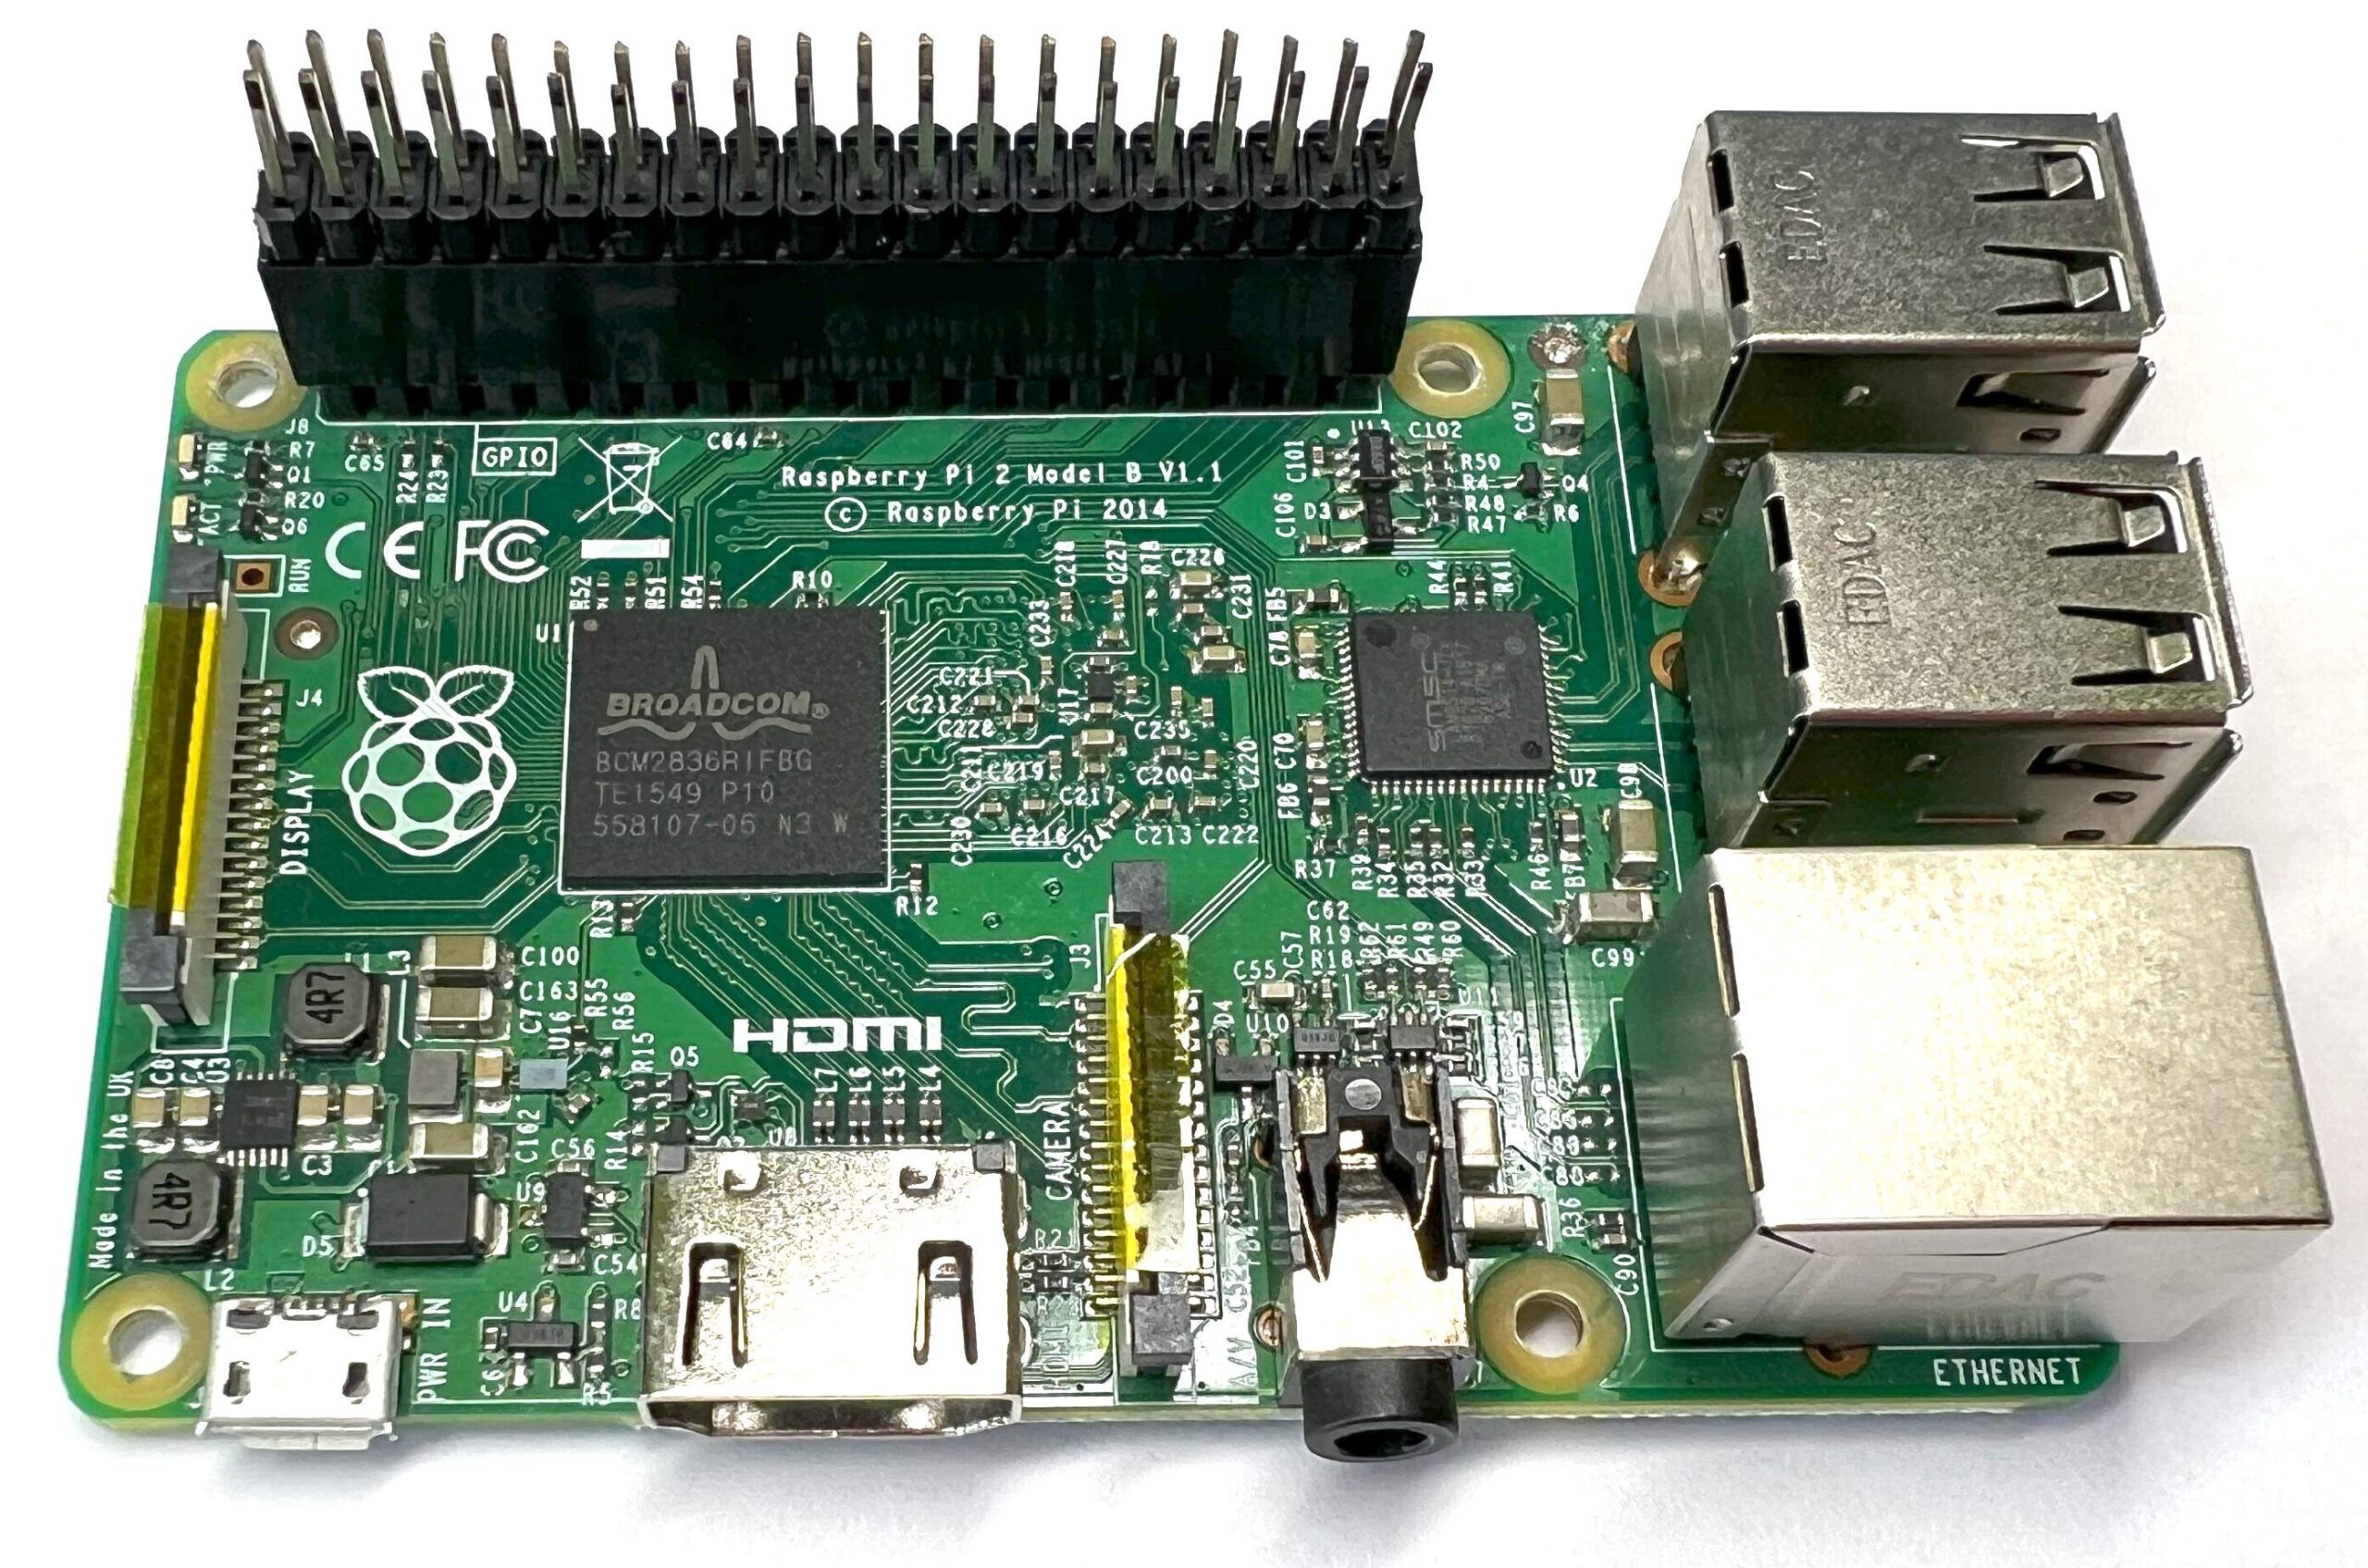
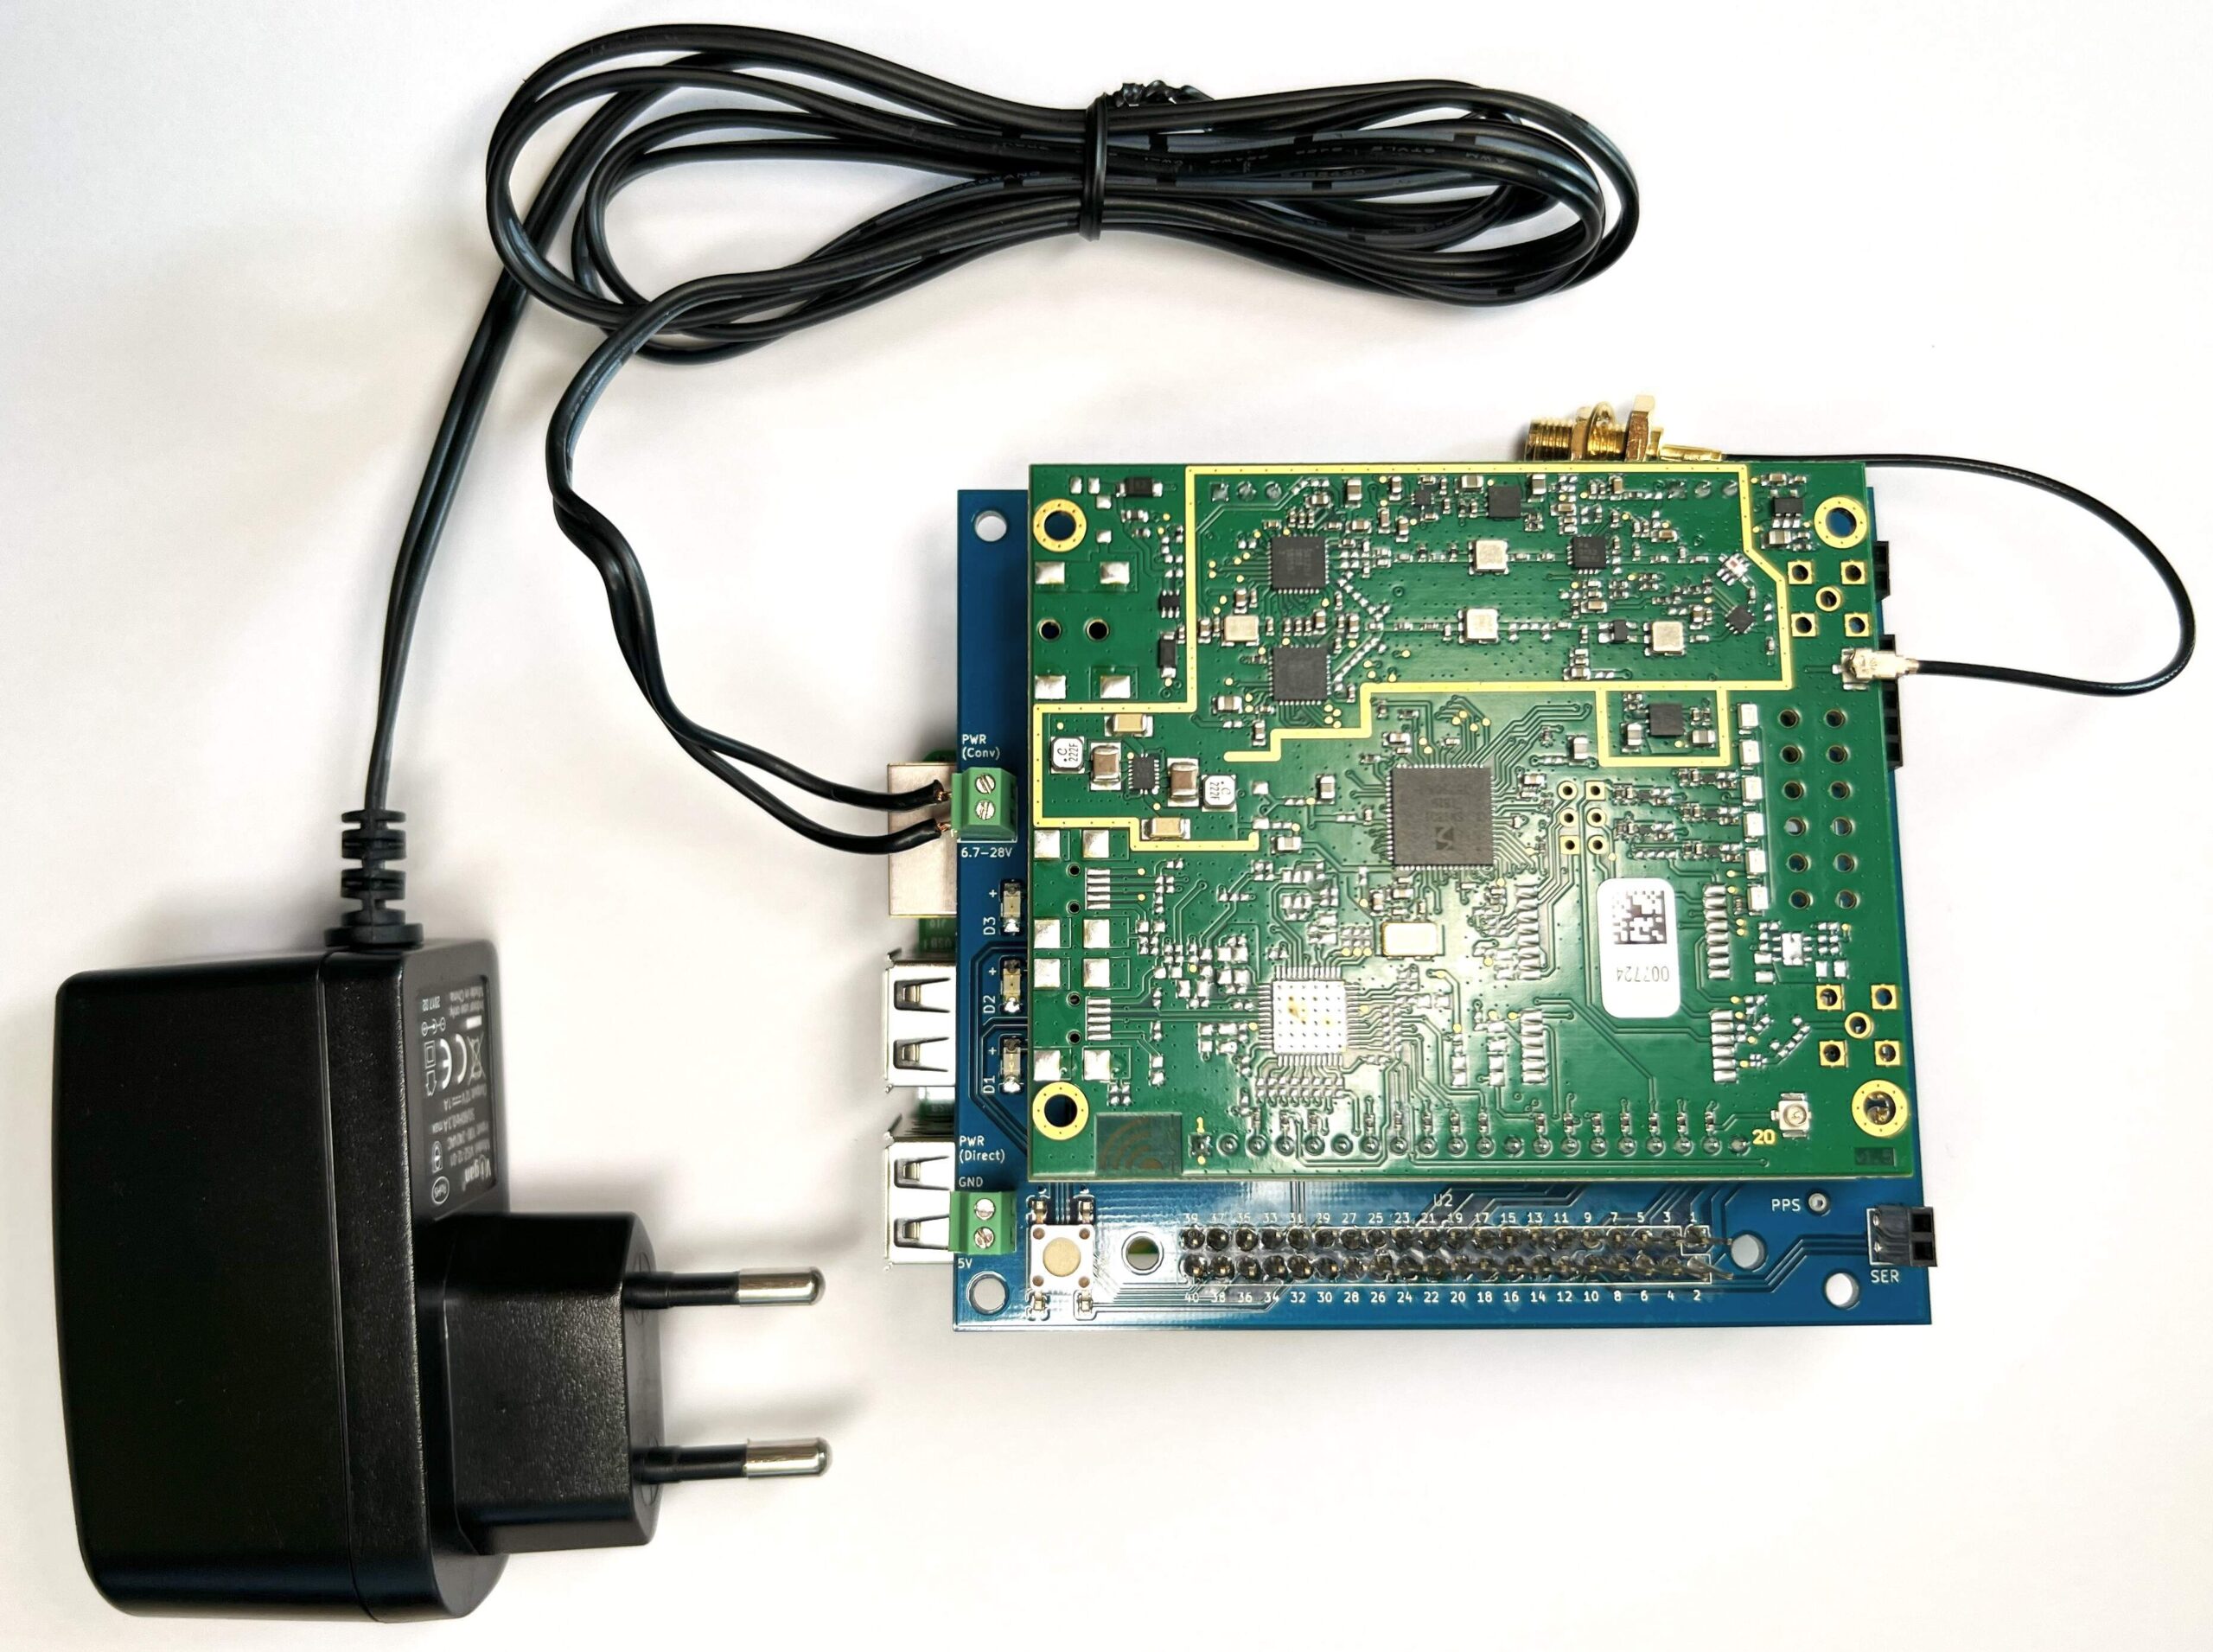
- Connect the iC880A Backplane v1.5 to the Stacking Header for Pi.
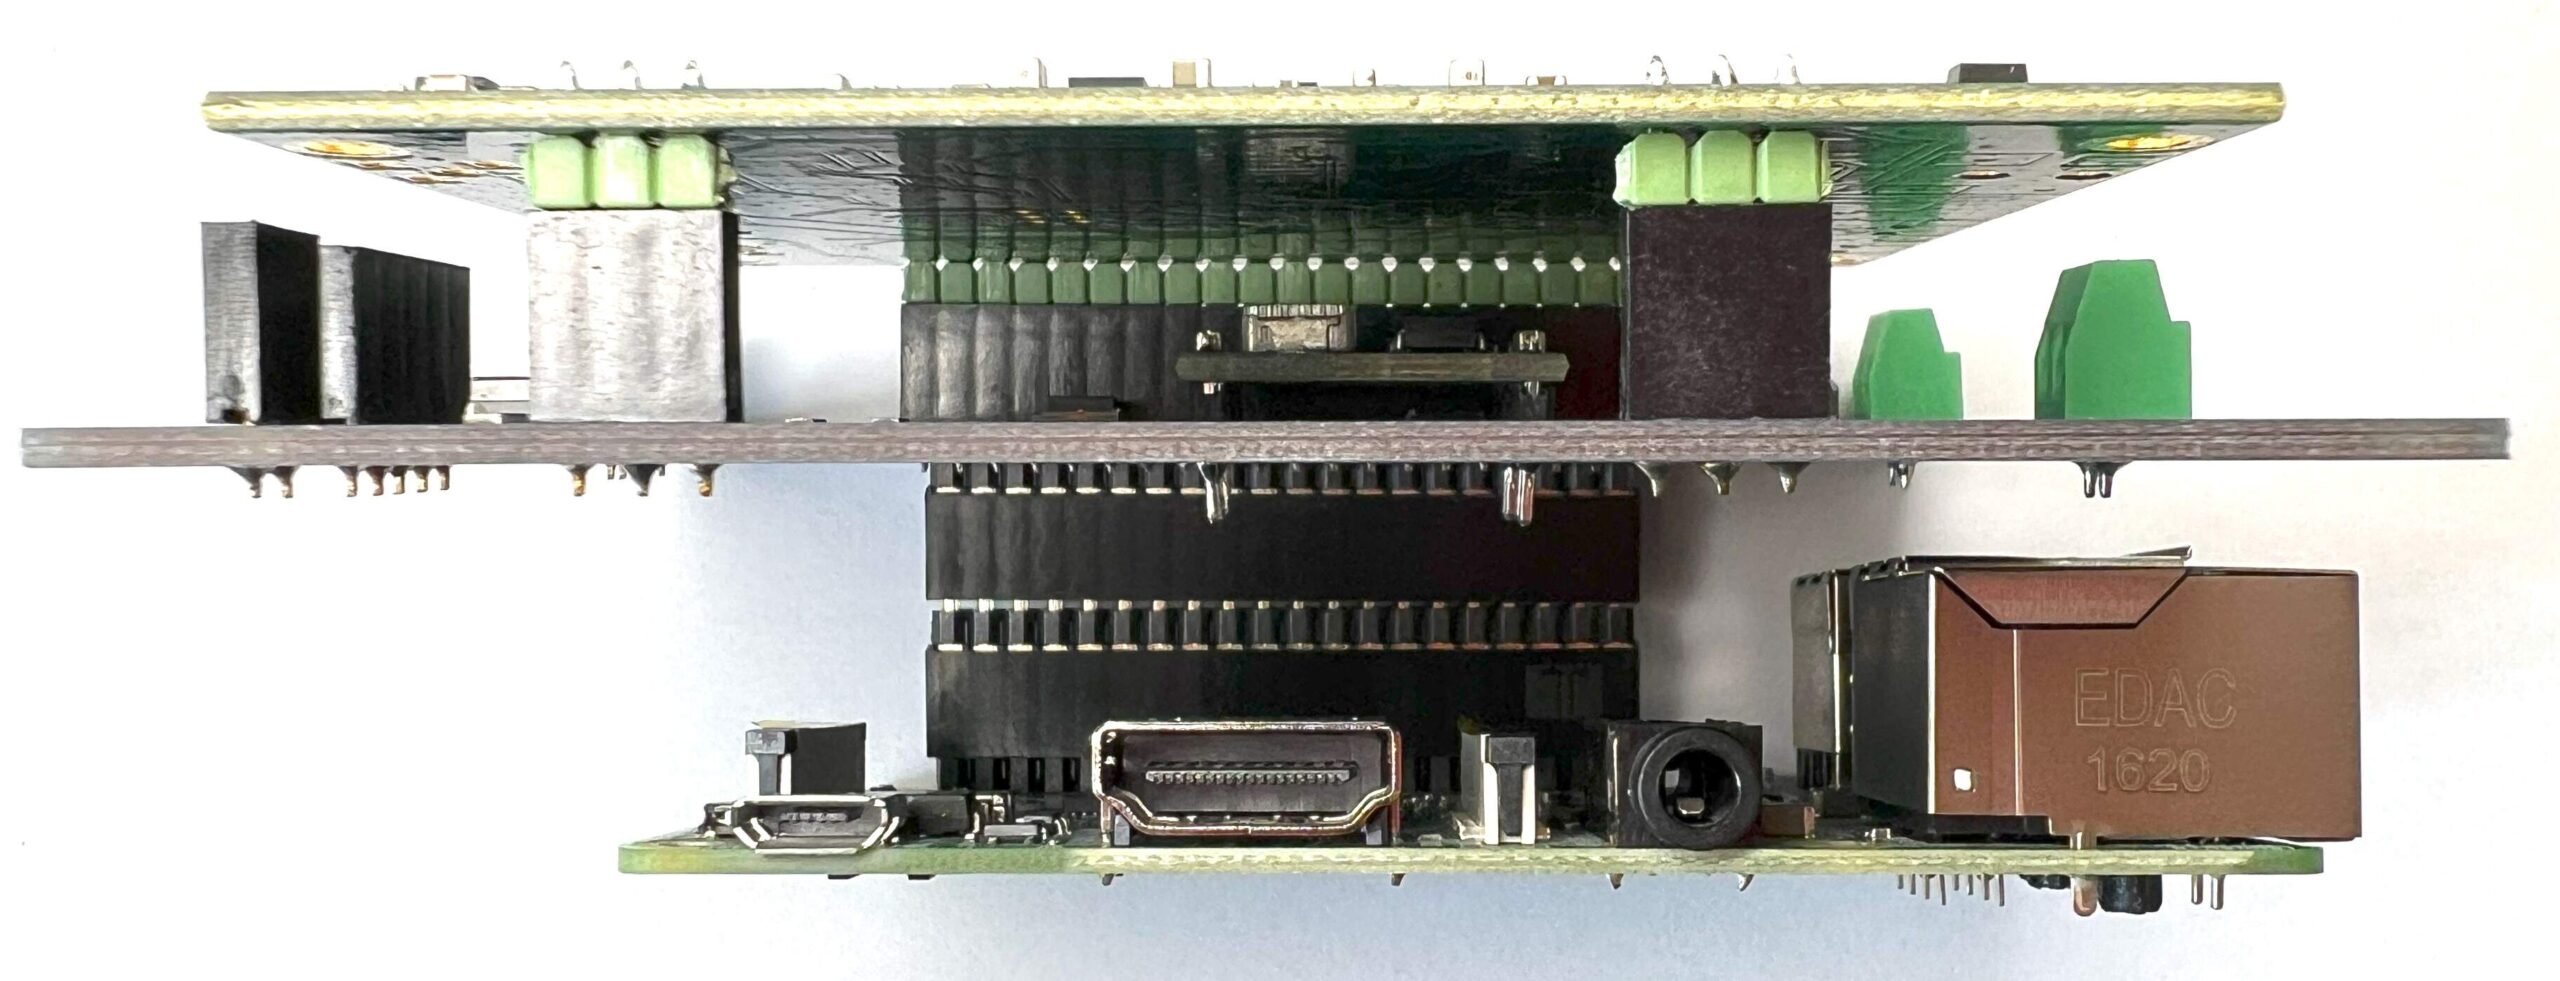
- Finally, connect the SMA to uFL/u.FL/IPX/IPEX RF Adapter Cable to the iC880A-SPI LoRa Concentrator module and power supply to the iC880A Backplane v1.5.
Class B support
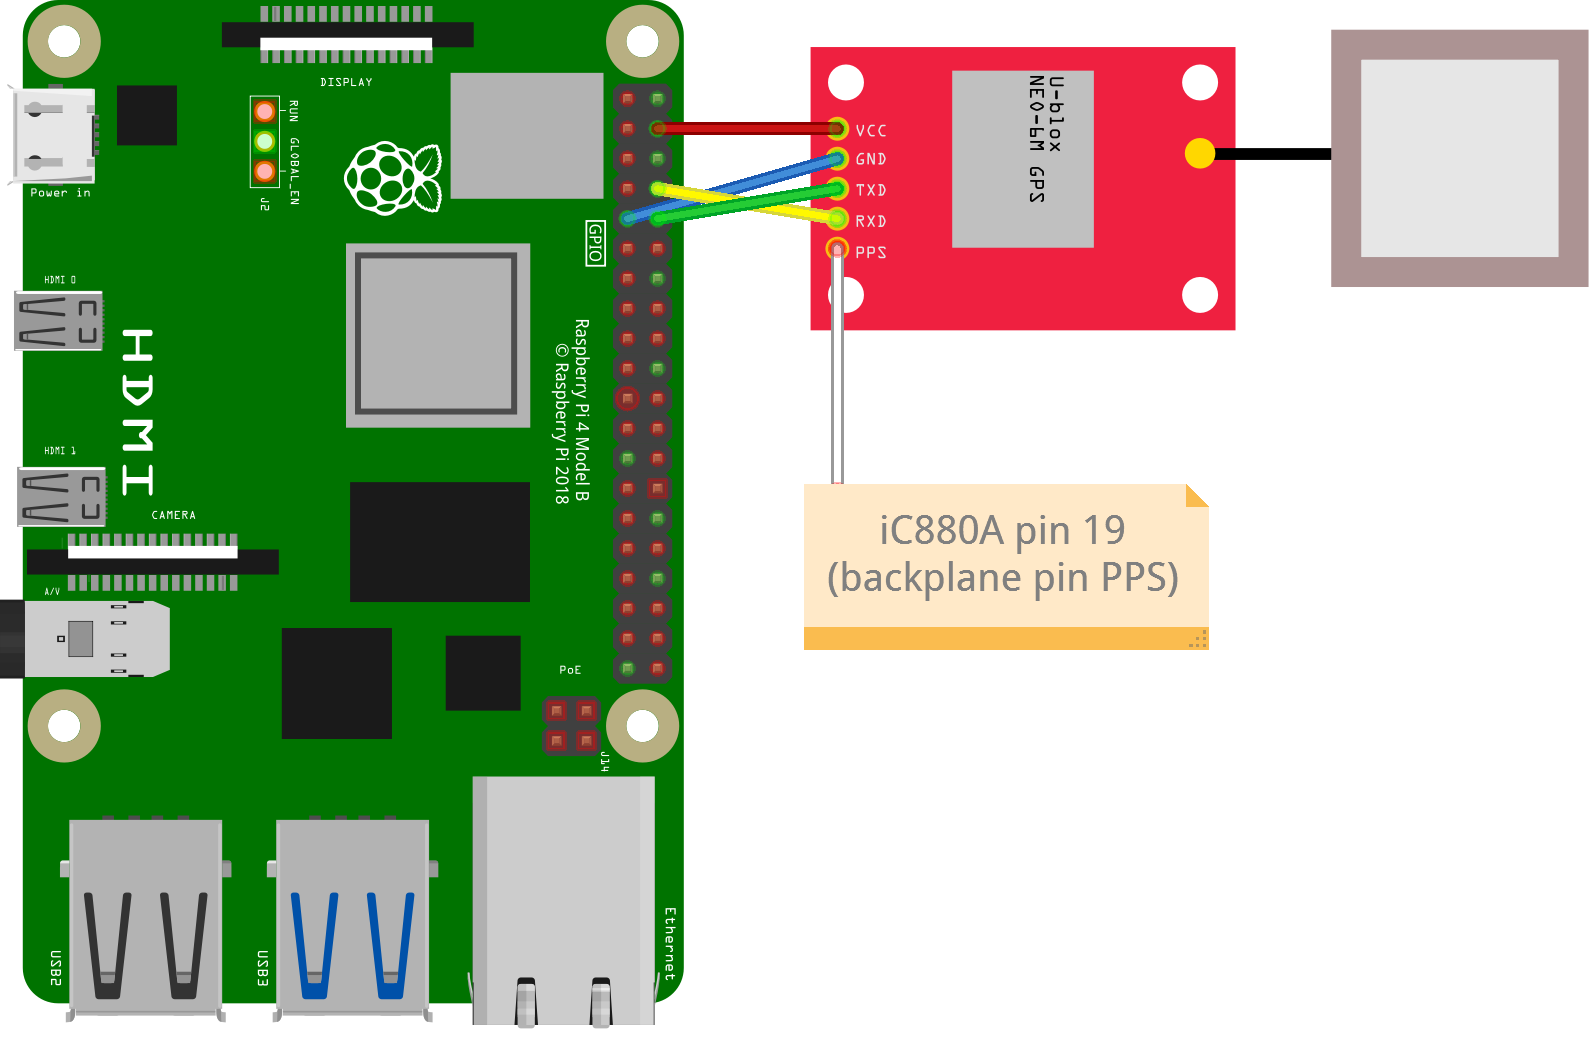
- Connect the GPIO pins to the GPS NEO-6M GYNEO6MV2 according to the table, wiring diagram and image.
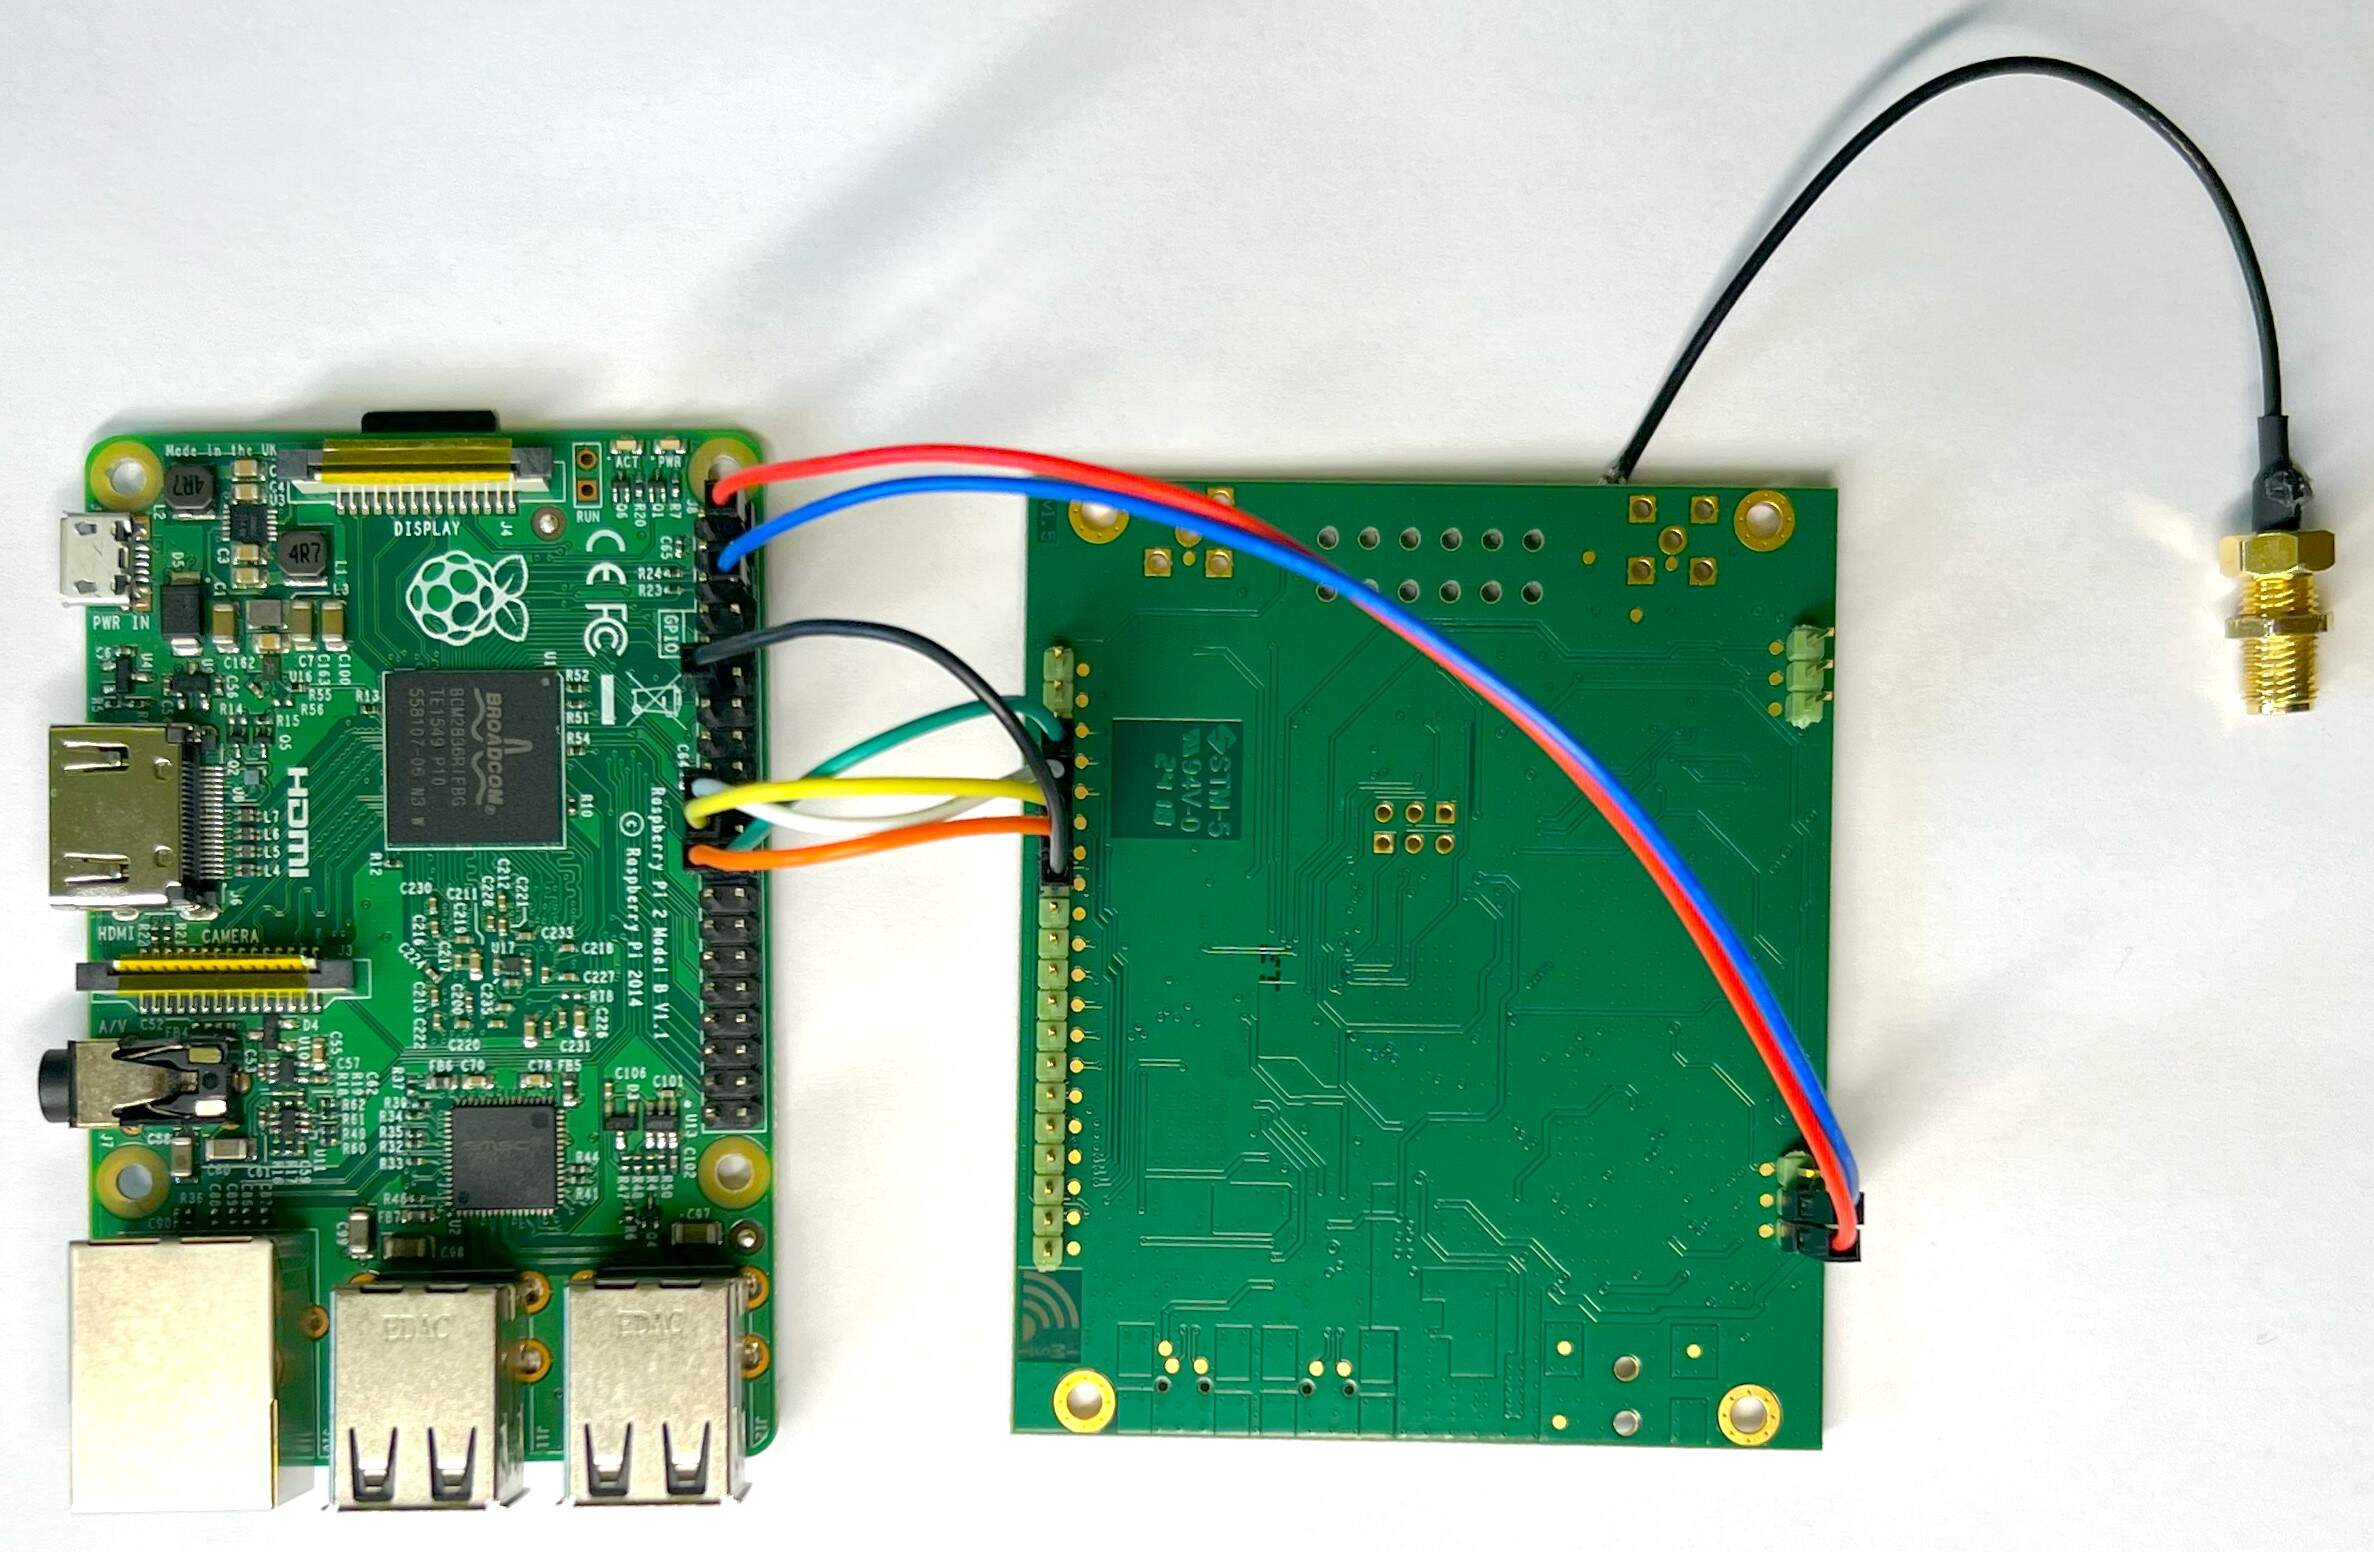
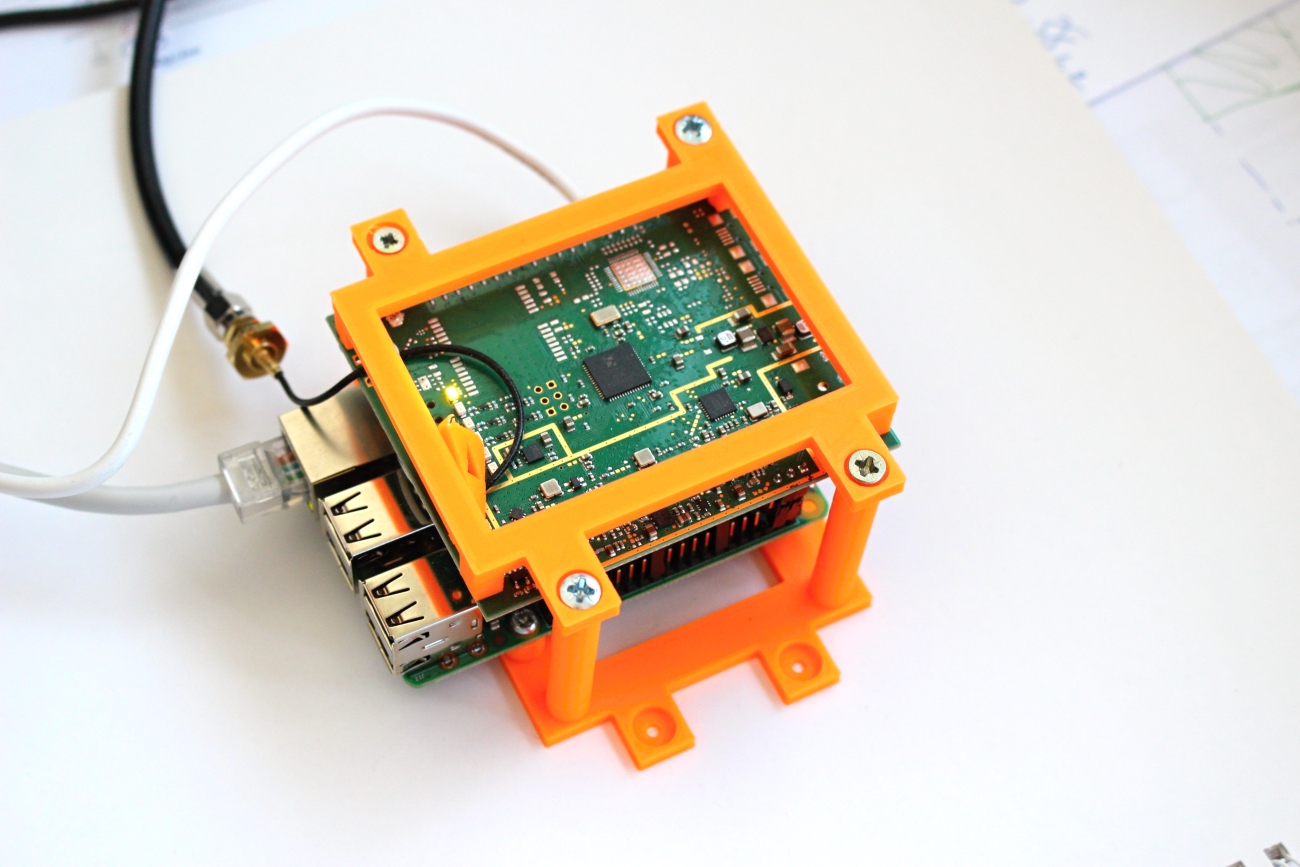
Assembly 2
- Prepare all the components.
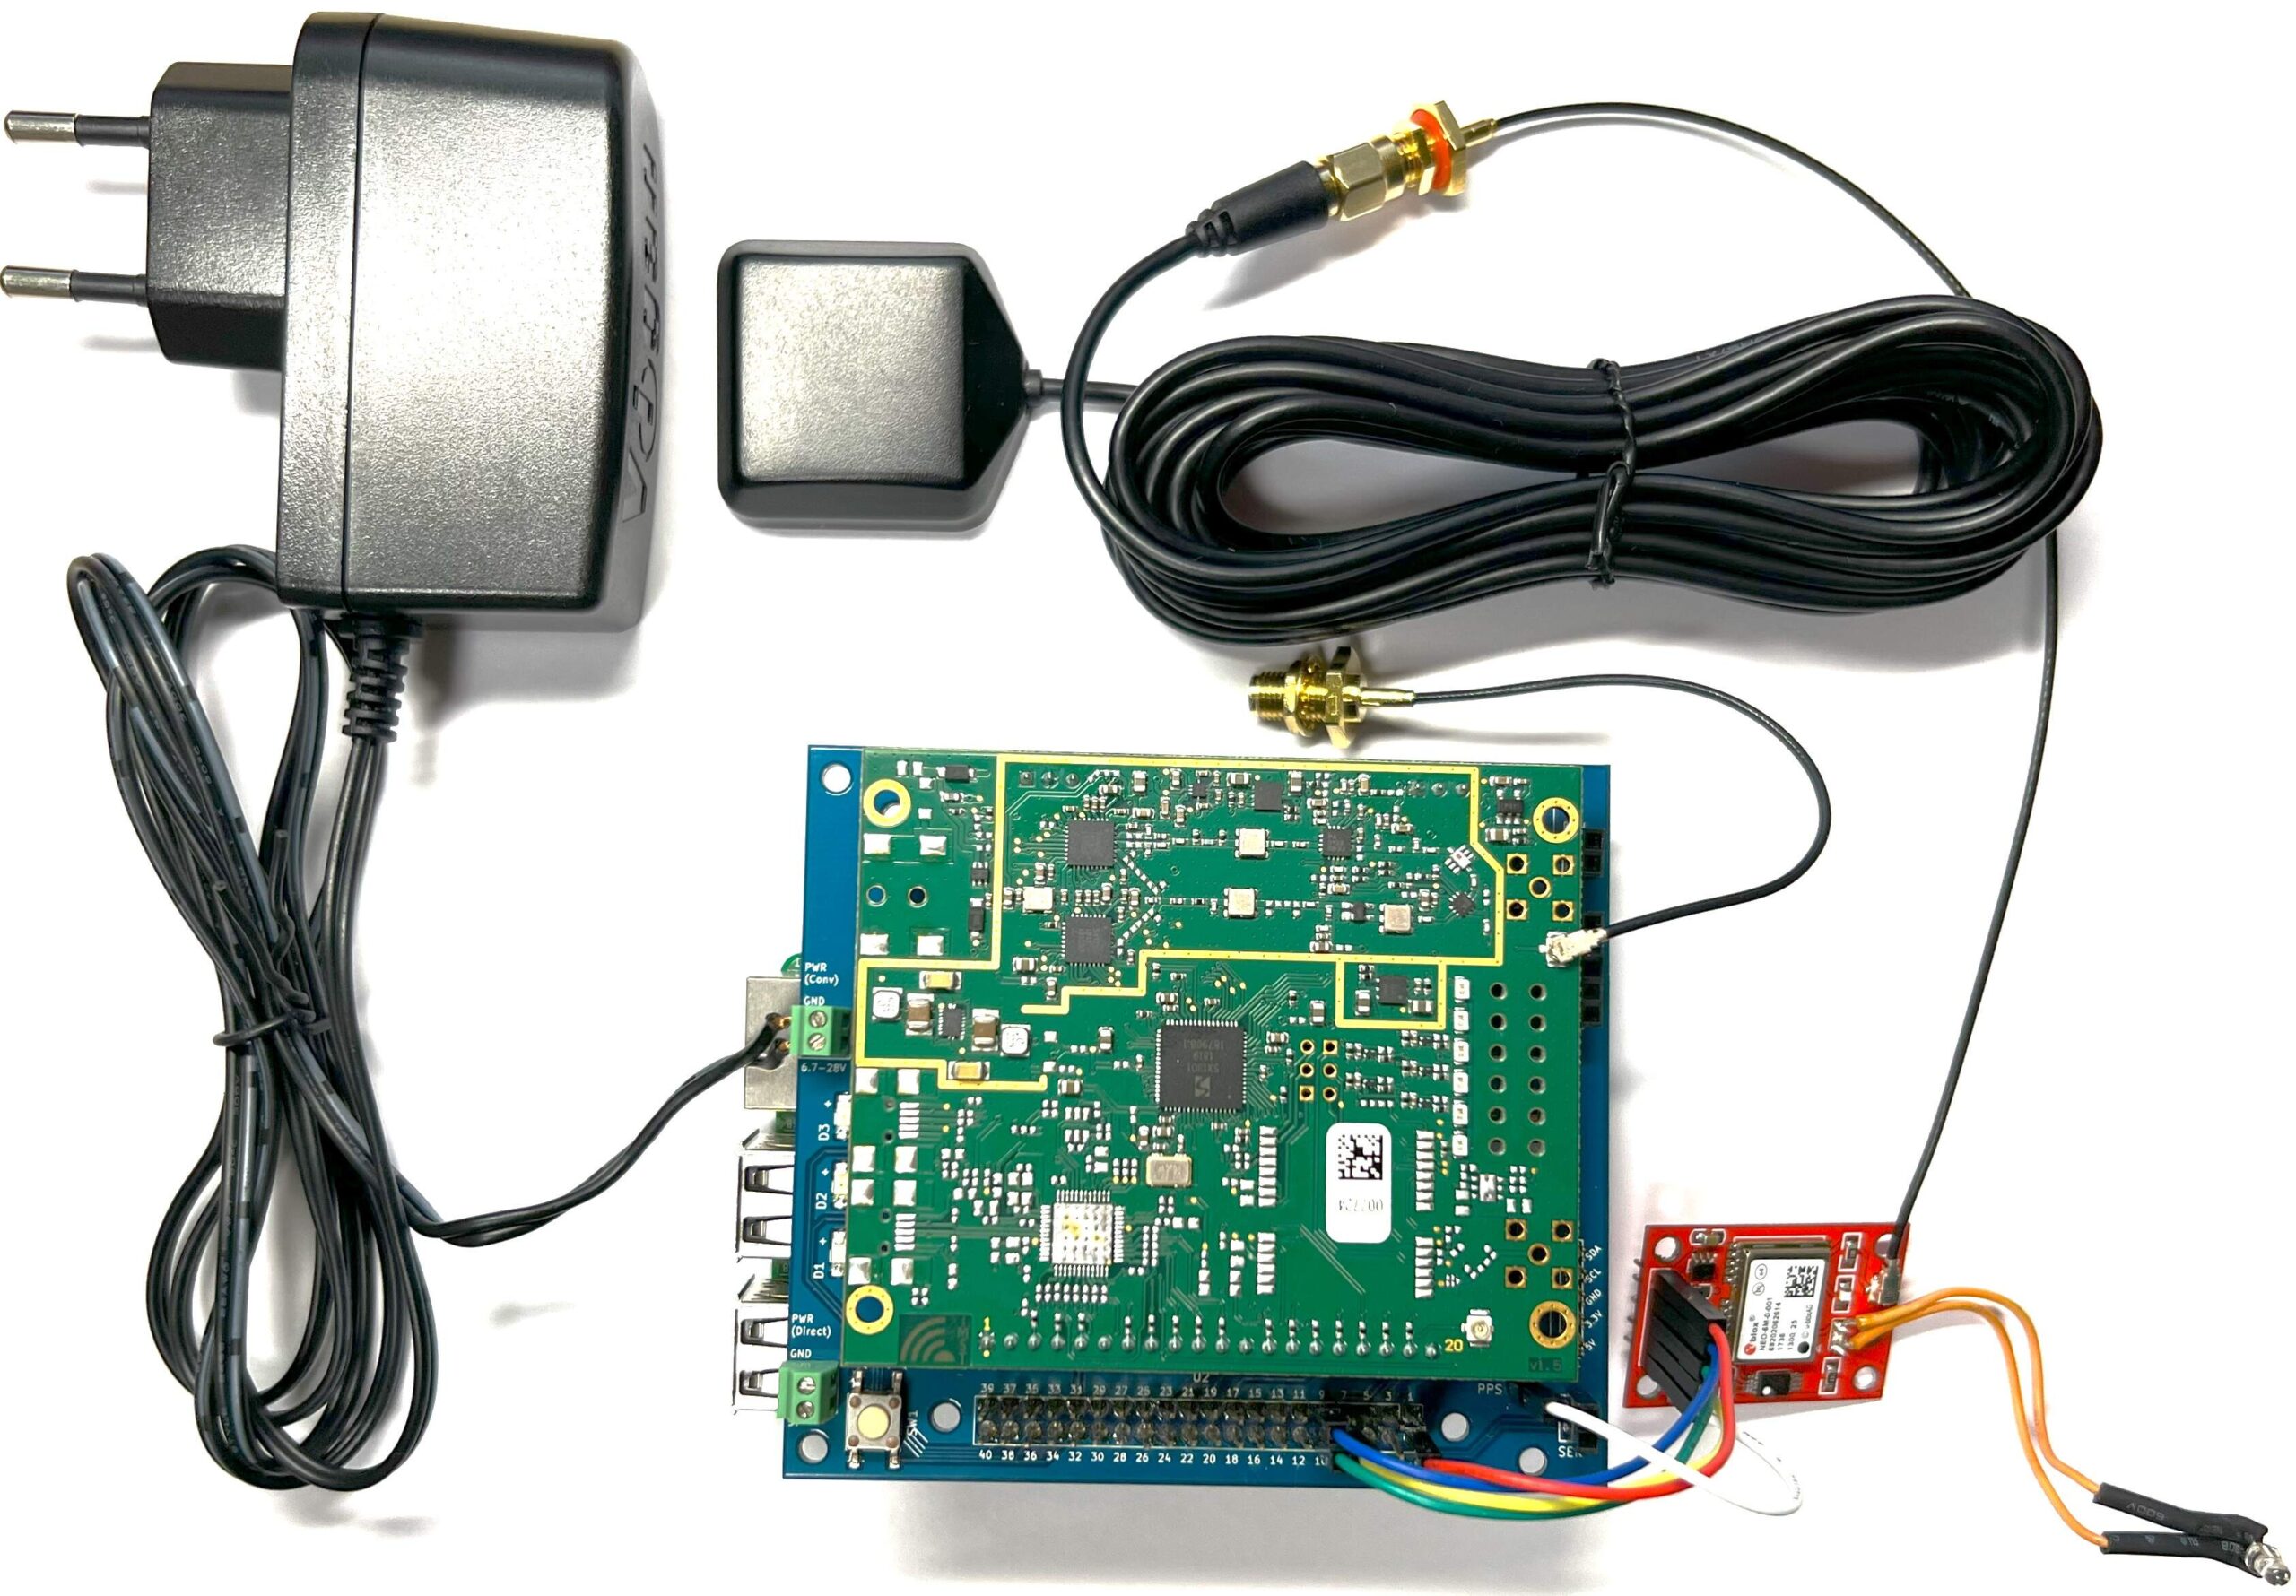
- Connect the GPIO pins to the iC880A-SPI LoRa Concentrator module according to the table and image below.
- Finally, connect the SMA to uFL/u.FL/IPX/IPEX RF Adapter Cable to the iC880A-SPI LoRa Concentrator module.
- If you want, you can attach the components to the 3D printed holder with screws.
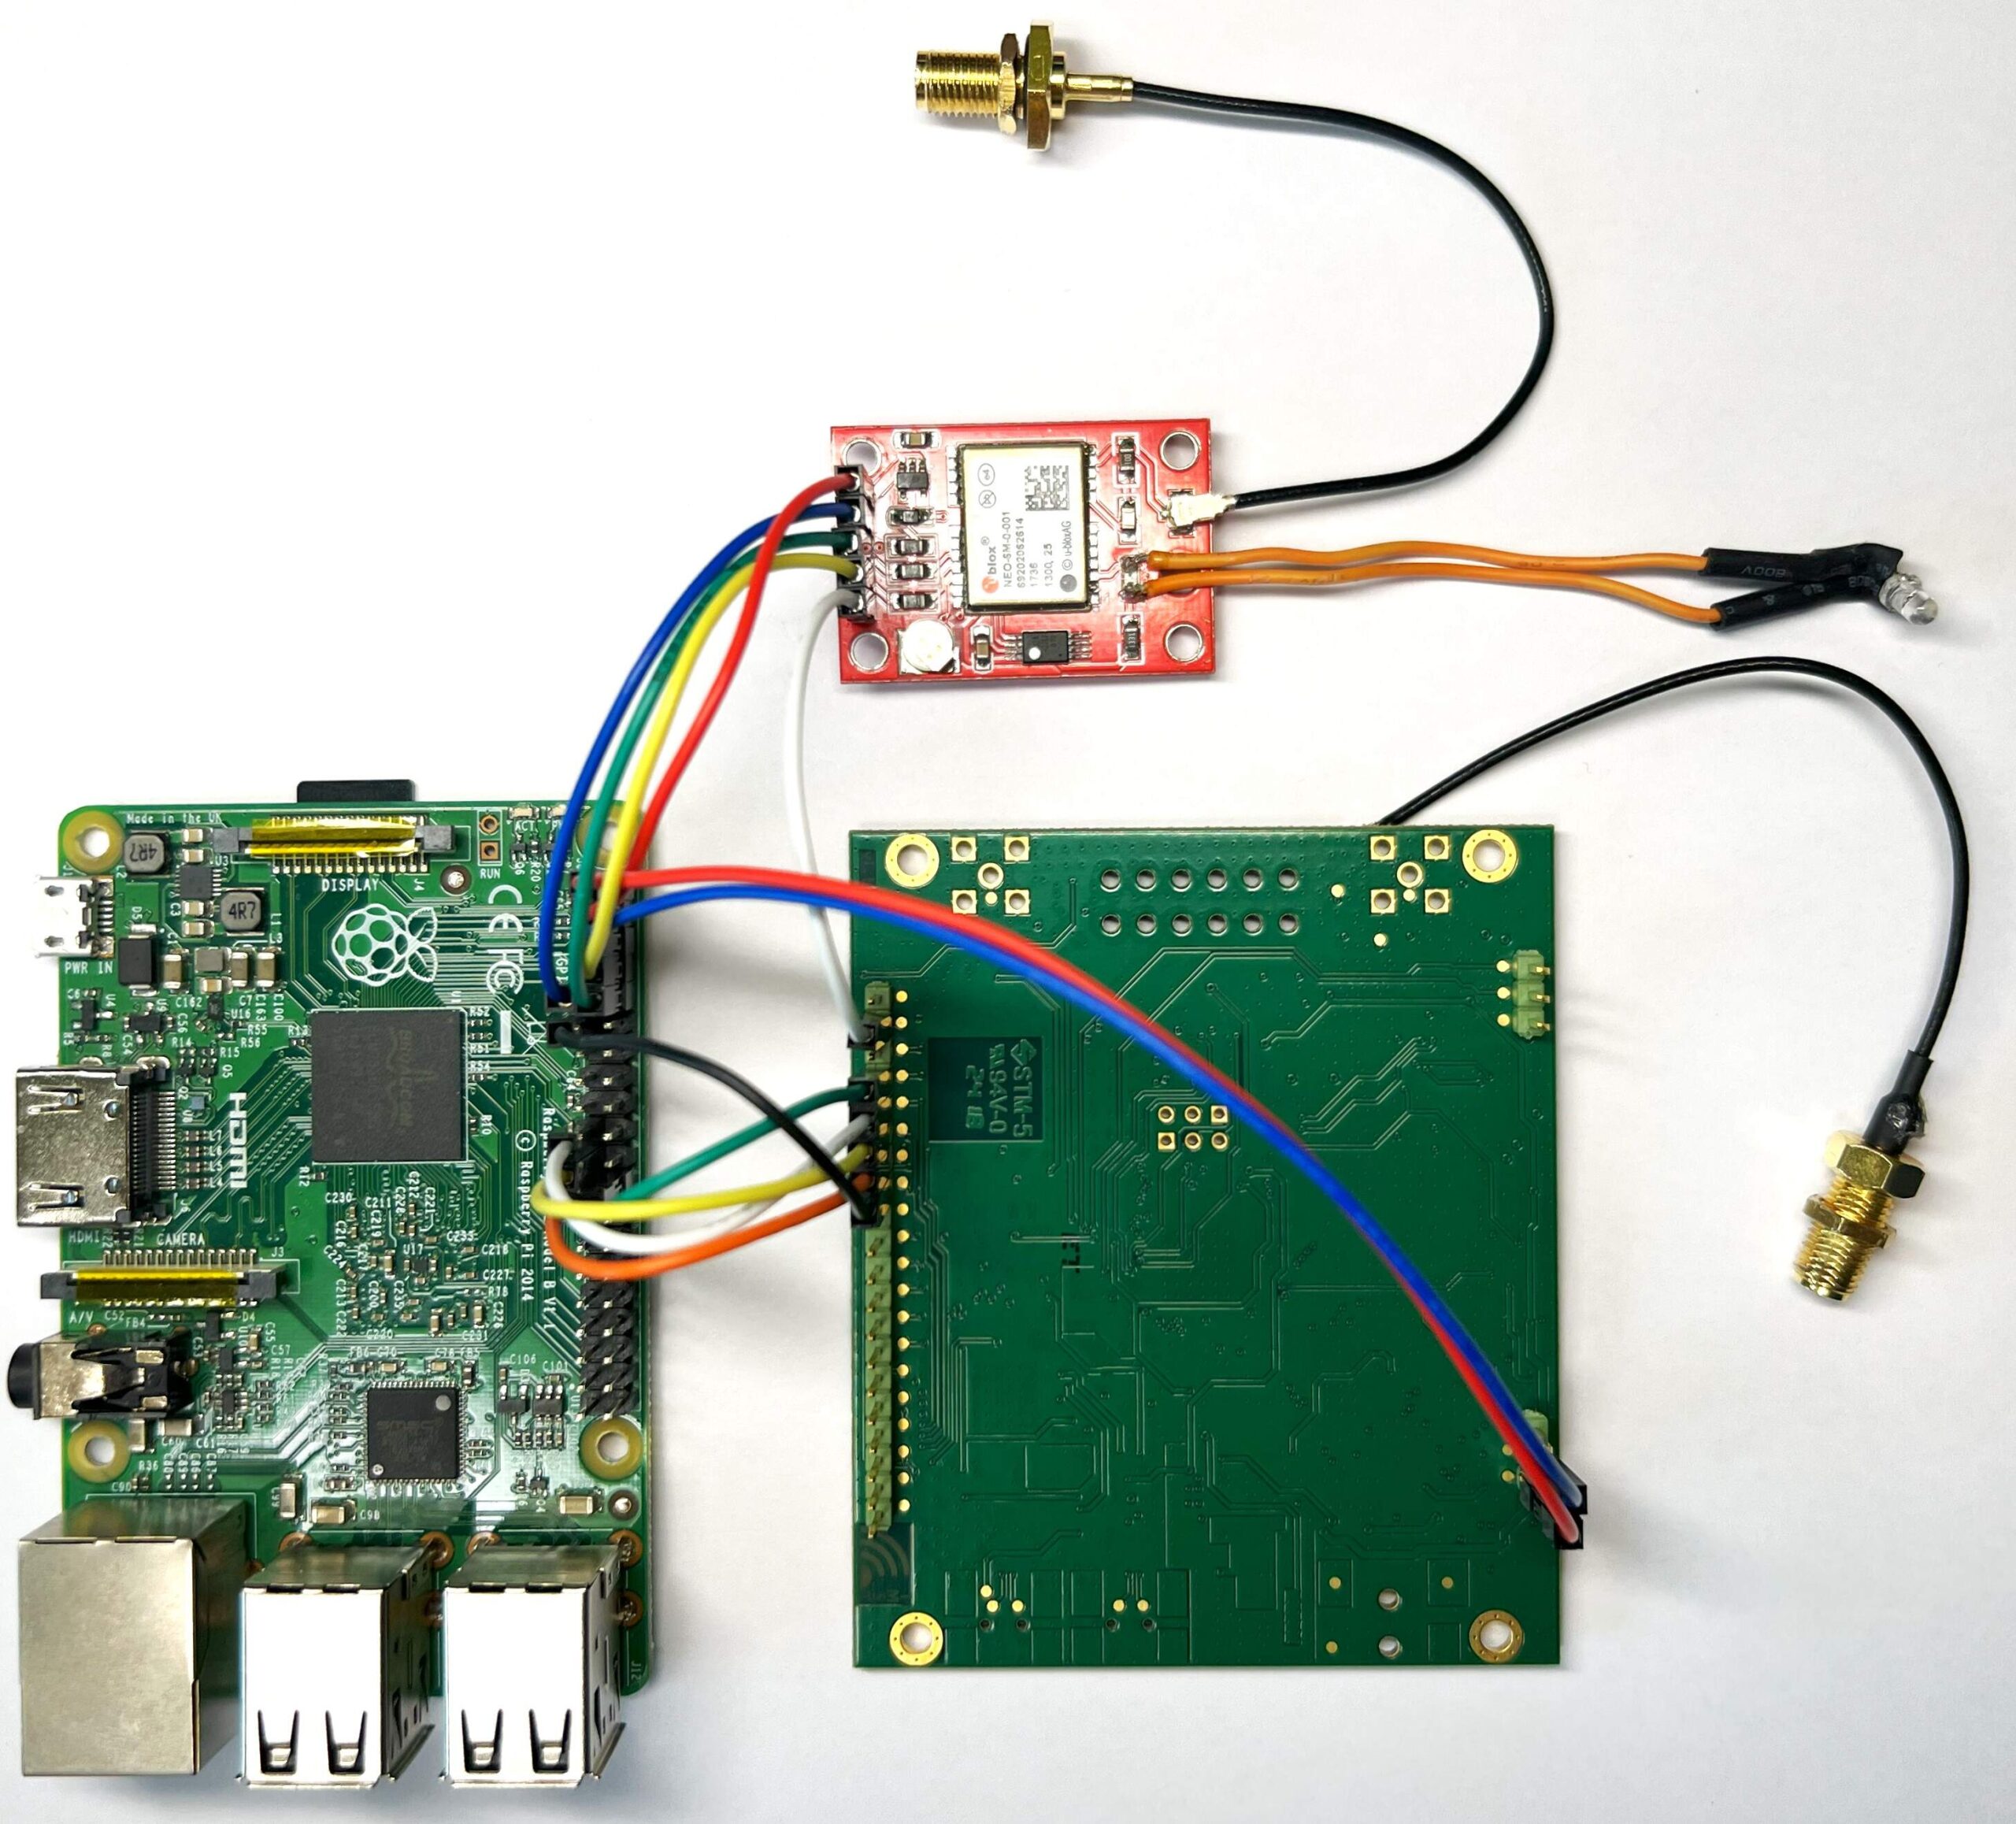
Class B support
- Connect the GPIO and iC880a pins to the GPS NEO-6M GYNEO6MV2 according to the table, wiring diagram and image.
Raspberry Pi OS setup
- From https://www.raspberrypi.com/software/ download Raspberry Pi Imager and install it.
- Insert the microSD card into the computer.
- Run Raspberry Pi Imager.
- Click on CHOOSE OS.
- Click on Raspberry Pi OS (other).
- Click on Raspberry Pi OS Lite (32-bit).
- Click on CHOOSE STORAGE.
- Select the inserted microSD card on which you want to install Raspberry Pi OS.
- Click on Next.
- Would you like to apply OS customisation settings? – EDIT SETTINGS.
- Set hostname.
- Set username and password. (we recommend a 17-digit password containing lower and upper case letters, numbers and symbols)
- If you will use WiFi – Configure wireless LAN. (optional)
- Set locale settings.
- Click on tab SERVICES.
- If you will be connecting remotely via SSH – Enable SSH – Use password authentication. (optional)
- Click on SAVE.
- Click on YES.
- Click on YES.
- Click on CONTINUE.
- Insert the microSD card into the Raspberry Pi.
- Turn on the Raspberry Pi.
Remote connection via SSH (optional)
- Connect to your router and find the IP address of your Raspberry Pi.
- From a Windows PC, you can connect using Command Prompt (CMD) or PuTTY.
- On Windows PC open Command Prompt (CMD).
- Type
ssh -p port username@IP_Address(for example: ssh -p 22 loravsb@192.168.1.120). - Type your password.
Post-installation steps
- Update, upgrade and reboot Raspberry Pi. This will ensure that any security vulnerabilities are patched:
$ sudo apt update
$ sudo apt full-upgrade
$ sudo reboot
- Connect again via SSH.
- Use a different port for SSH and disable root login. First, open the SSH configuration file with a text editor:
$ sudo nano /etc/ssh/sshd_config
- Locate the line with
Port 22and change it to the desired port number (for example, change the port to 2222). Locate the line withPermitRootLoginand change its value tono(this will disable root login via SSH):Port 2222 PermitRootLogin no - Save the changes and exit the text editor.
- Restart the SSH service to apply the changes:
$ sudo systemctl restart ssh
- Log out and connect again via SSH on the new port.
- Install and configure the built-in firewall, ufw, to limit incoming network connections. In the
sudo ufw limit 2222/tcprule, change port 2222 to port you have chose for SSH above.$ sudo apt install ufw $ sudo ufw default deny incoming $ sudo ufw limit 2222/tcp $ sudo ufw enableNote: Firewall rules will have no effect on ports opened by Docker.
- Reboot Raspberry Pi:
$ sudo reboot
Docker
- Connect again via SSH.
- Install the latest Docker version using the convenience script provided by docker:
$ curl -fsSL https://get.docker.com -o get-docker.sh
$ sudo sh get-docker.sh
$ sudo groupadd docker
$ sudo usermod -aG docker $USER
$ newgrp docker
$ sudo systemctl enable docker.service
$ sudo systemctl enable containerd.service
For more information on Docker installation, see https://docs.docker.com/engine/install/.
LoRa Basics Station setup
- First, get the Gateway EUI by running the following command:
$ cat /sys/class/net/eth0/address | awk -F\: '{print toupper($1$2$3"FFFE"$4$5$6)}'
The Things Stack
- Create an account on The Things Network if you don’t have one.
- Login on The Things Network.
- Click on your username and choose Console.
- Select a network cluster.
- Go to gateways.
- Click on button + Register gateway.

- Write the previously detected Gateway EUI in the Gateway EUI field.
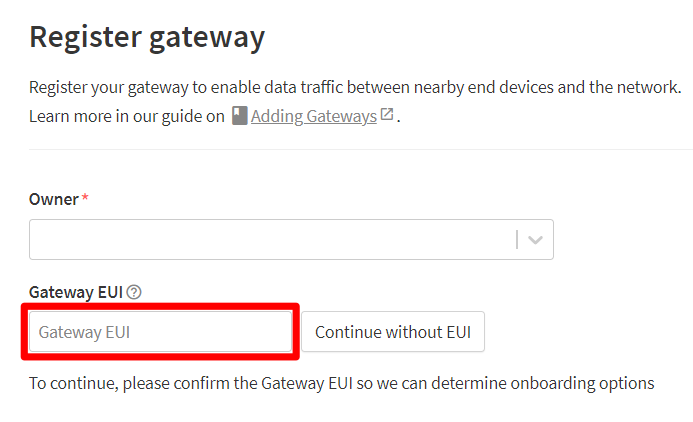
- Click on button Confirm.
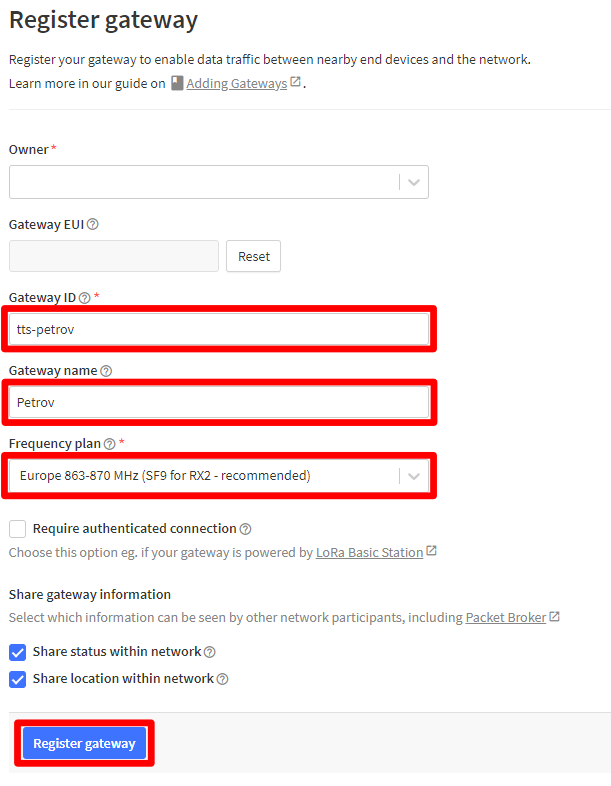
- Write something into Gateway ID.
- Write something into Gateway name.
- Frequency plan – Europe 863-870 MHz (SF9 for RX2 – recommended)
- Click on button Register gateway.
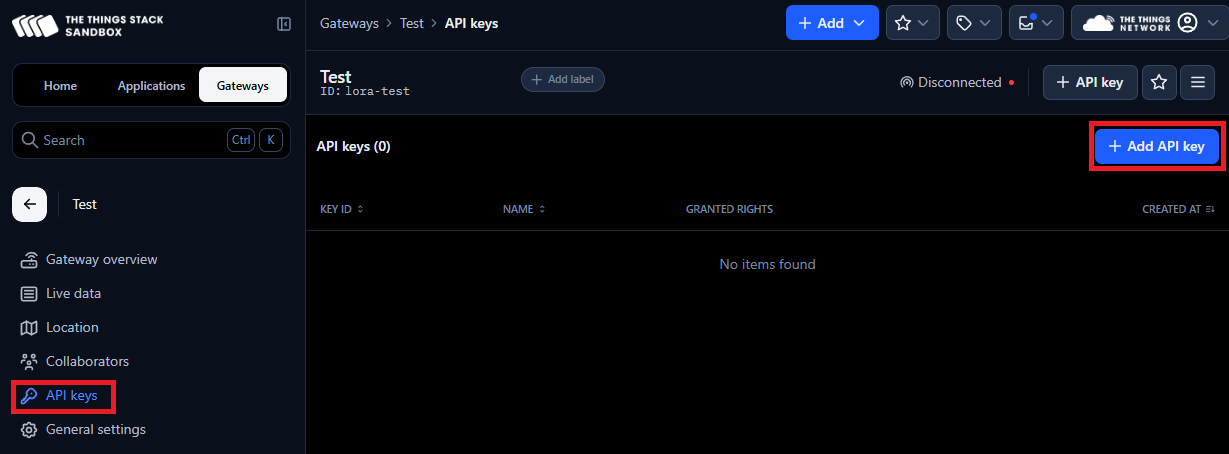
- In API keys click on button +Add API key.
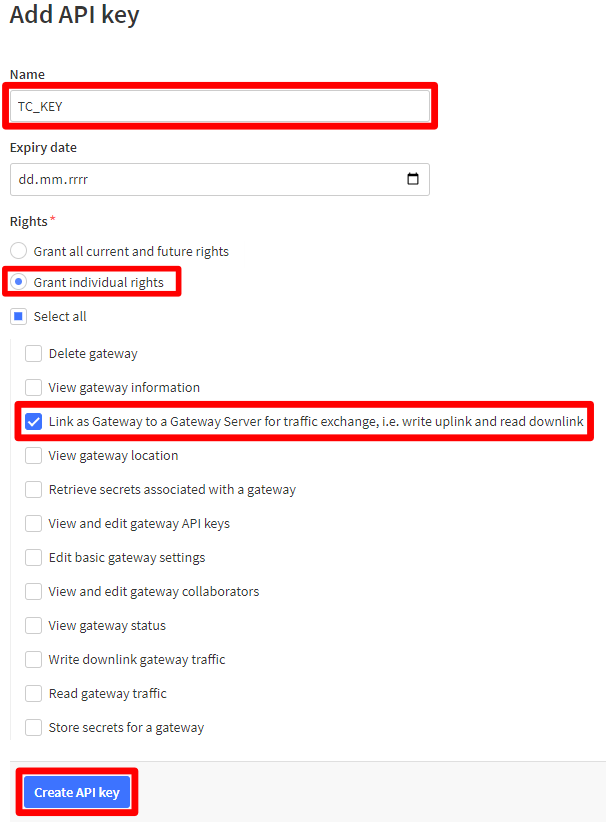
- Write something into Name.
- Click on Grant individual rights.
- Select Link as Gateway to a Gateway Server for traffic exchange, i.e. write uplink and read downlink.
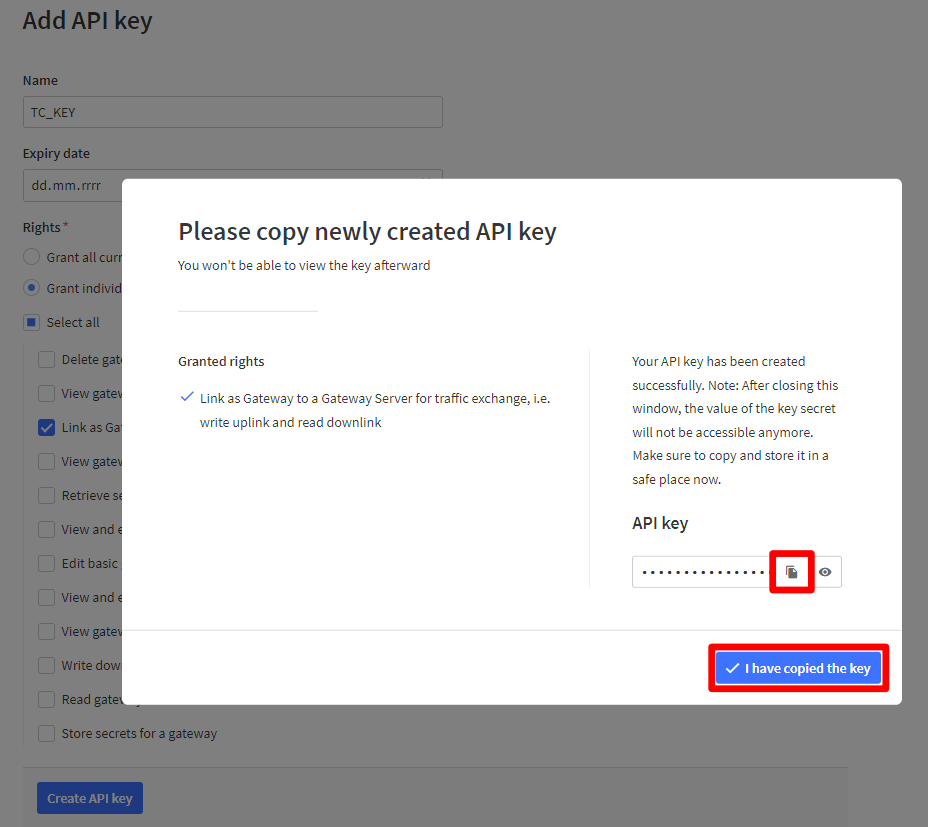
- Click on button Create API key.
- Click the Copy to clipboard button and paste the key into some text document for future use.
- Click on button I have copied the key.
Raspberry Pi’s Interfaces
- Run the following command to configure the Raspberry Pi’s Interfaces:
$ sudo raspi-config
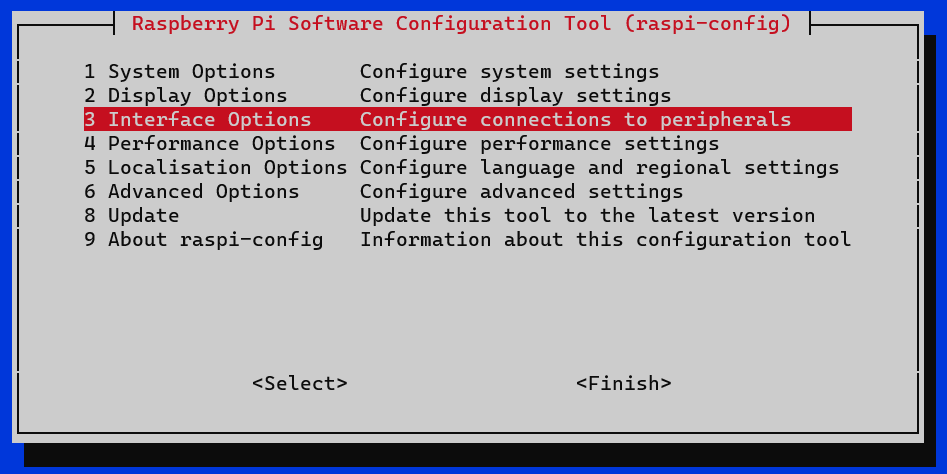
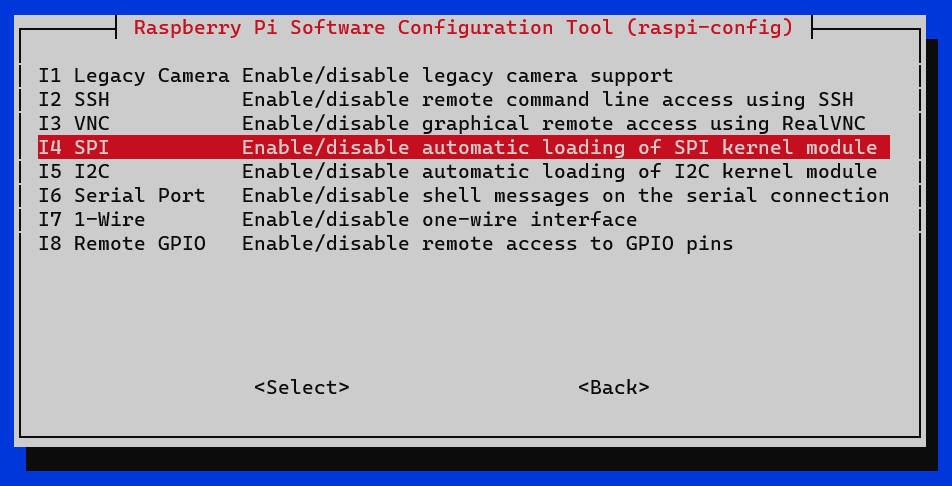
- In 3 Interface Options -> I4 SPI.
- Would you like the SPI interface to be enabled? -> Yes.
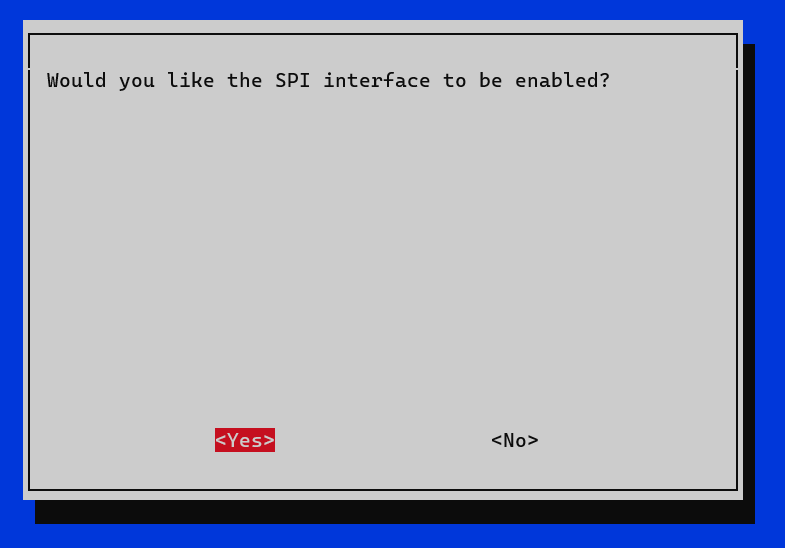
- Ok.
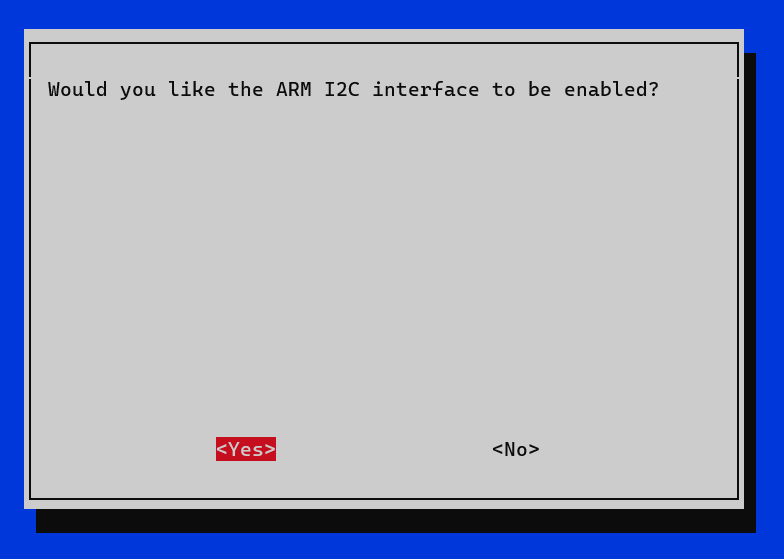
- In 3 Interface Options -> I5 I2C.
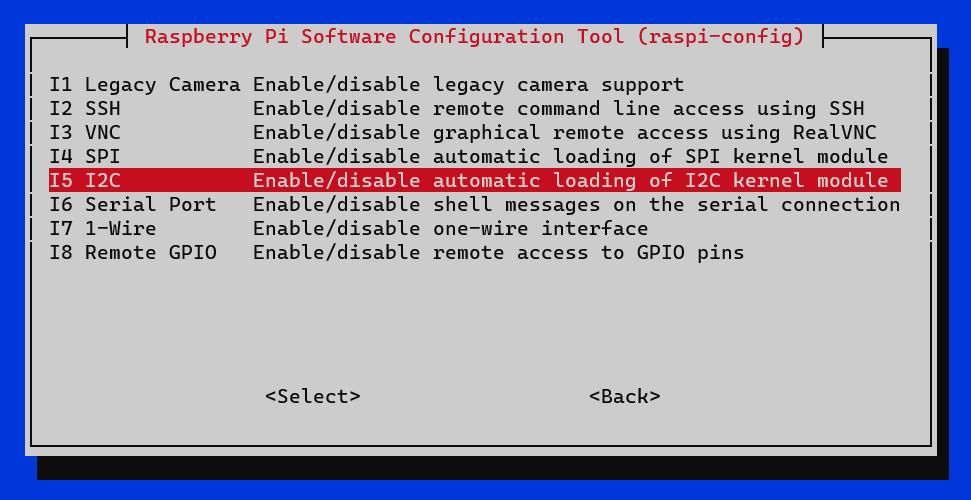
- Would you like the ARM I2C interface to be enabled? -> Yes.
- Ok.
- In 3 Interface Options -> I6 Serial Port.
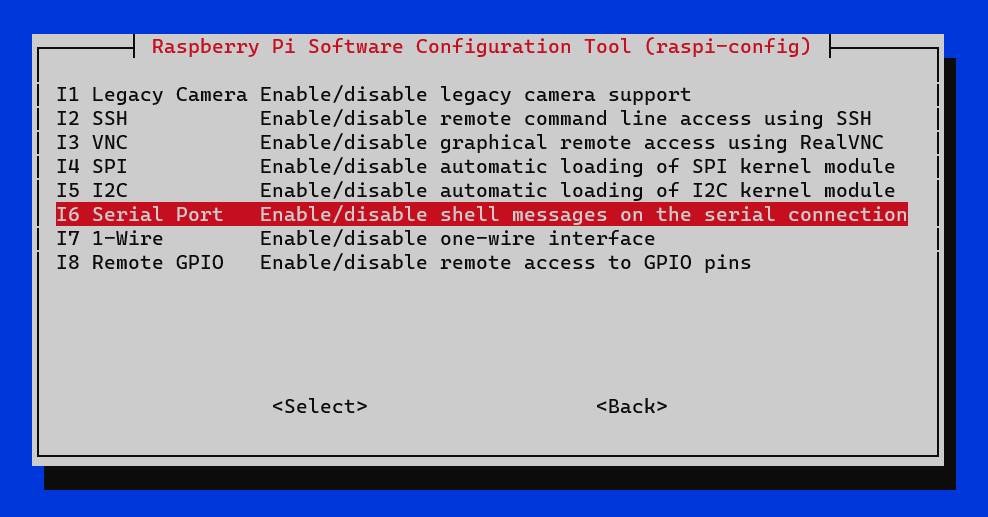
- Would you like a login shell to be accessible over serial? -> No.
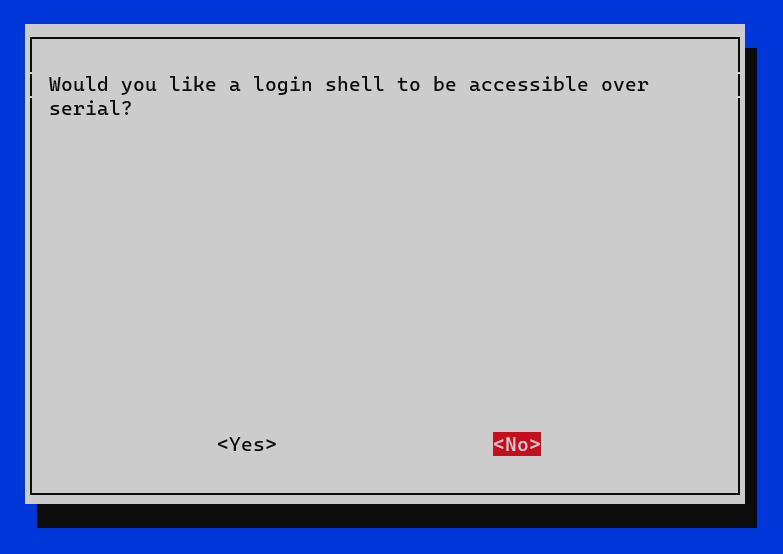
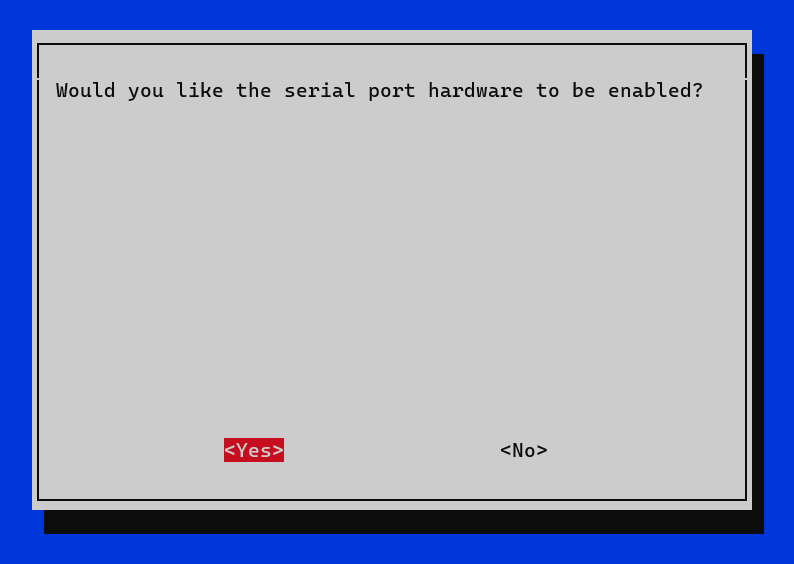
- Would you like the serial port hardware to be enabled? -> Yes.
- Ok.
- Finish.

- Would you like to reboot now? -> Yes.
LoRa Basics Station
- Connect again via SSH.
- Clone the repository with LoRa Basics Station and go to the created directory:
$ git clone https://github.com/RAKWireless/basicstation.git
$ cd basicstation
- Run this command to overwrite the station.v2.conf file with a new file containing the PPS settings:
$ curl -L https://raw.githubusercontent.com/OndrejKnebl/gateway-patch/main/station.v2.conf > runner/station.v2.conf
- Run this commands to patch the Dockerfile. If you are not using a 64-bit ARMv8 computer (like Raspberry Pi 4), you can change line
+ARG ARCH=aarch64to+ARG ARCH=armv7hf(ARMv7) or+ARG ARCH=amd64(AMD64):$ curl -L https://raw.githubusercontent.com/OndrejKnebl/gateway-patch/main/dockerfile.patch > dockerfile.patch $ nano dockerfile.patch $ patch Dockerfile < dockerfile.patch
- Build the image by using the buildx extension of docker. If you are not using a 64-bit ARMv8 computer (like Raspberry Pi 4), you can change
aarch64toarmv7hf(ARMv7) oramd64(AMD64): -
$ VARIANT=std docker buildx bake --load aarch64
- Return to the parent folder:
$ cd ..
- Run this command to create and edit the docker-compose.yml file:
$ sudo nano docker-compose.yml
- Copy and paste the configuration below into your docker-compose.yml file. Copy and paste the API key you got previously saved to the TC_KEY variable. If you are not using a 64-bit ARMv8 computer (like Raspberry Pi 4), you can change
aarch64toarmv7hf(ARMv7) oramd64(AMD64).version: '2.0' services: basicstation: image: xoseperez/basicstation:aarch64-latest # If not using a 64-bit ARMv8 computer, change aarch64 container_name: basicstation restart: unless-stopped privileged: true network_mode: host environment: MODEL: "IC880A" SPI_SPEED: 2000000 # If using backplane = 2000000, if wired and not working properly = 1000000 GW_RESET_GPIO: 25 # If using backplane = 25, otherwise define your GPIO reset TC_KEY: "NNSXS...." # Copy here your API key from the TTS USE_LIBGPIOD: 1 - Now, you can start it running in the background with the following command:
$ sudo docker compose up -d
- Finaly, check that the gateway status is Connected in the TTS console.
For more information on LoRa Basics™ Station for Docker, see: