
| TTN version: | TTNv3 / TTS SANDBOX |
| Board: | Adafruit Feather M0 |
| Activation: | OTAA / ABP |
| Device Class: | Class A |
| Last revision: | December 14, 2024 |
This article provides instructions for downlink reception and Cayenne LPP format decoding using Adafruit Feather M0 RFM95 LoRa Radio. If you haven’t set up Adafruit Feather M0 yet, check out our Adafruit Feather M0 tutorial.
Prepare
- Adafruit Feather M0 with RFM95 LoRa Radio – 900 MHz
- 1x wire
- breadboard (optional)
- PC + micro USB cable
Fair Use Policy
The TTN documentation says about Fair Use Policy:
On The Things Network’s public community network a Fair Use Policy applies which limits the uplink airtime to 30 seconds per day (24 hours) per node and the downlink messages to 10 messages per day (24 hours) per node. If you use a private network, these limits do not apply, but you still have to be compliant with the governmental and LoRaWAN limits.
Note: Don’t send more than 10 downlinks per day per node.
Downlinks – Device Class A
End-devices of Class A allow for bi-directional communications whereby each end-device’s uplink transmission is followed by two short downlink receive windows. The transmission slot scheduled by the end-device is based on its own communication needs with a small variation based on a random time basis (ALOHA-type of protocol). This Class A operation is the lowest power end-device system for applications that only require downlink communication from the server shortly after the end-device has sent an uplink transmission. Downlink communications from the server at any other time will have to wait until the next scheduled uplink.
See the documentation for more information on device classes.
Assembly
Wire up the Adafruit Feather M0’s IO1 pin with pin 6.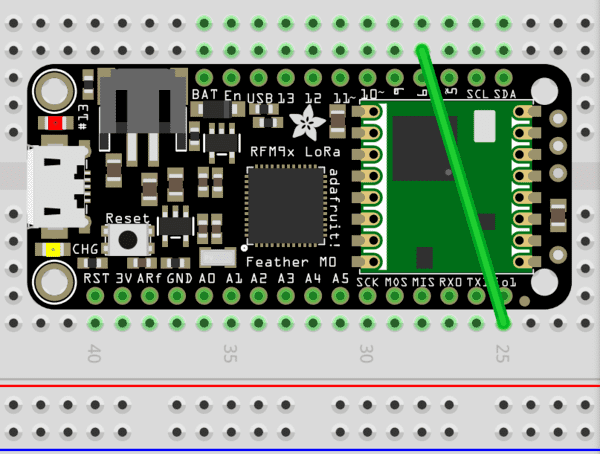
Printing decoded downlinks to Serial Monitor
- Copy and paste one of the programs bellow (based on your chosen activation method, OTAA or ABP) into your Arduino IDE:
- OTAA_Receiving_and_decoding_downlinks
- In OTAA program replace APPEUI, DEVEUI and APPKEY with keys in TTS. Keys are in TTS -> Applications -> YourAppName -> YourEndDeviceName -> Overview -> Activation information.
- ABP_Receiving_and_decoding_downlinks
- In ABP program replace NWKSKEY, APPSKEY and DEVADDR with keys of your end device registred in TTS. Keys are in TTS -> Applications -> YourAppName -> YourEndDeviceName -> Overview -> Session information.
- OTAA_Receiving_and_decoding_downlinks
- Connect Adafruit Feather M0 using micro USB cable to your computer.
- In Arduino IDE click on Upload button to upload program to your Adafruit Feather M0.
- In Arduino IDE click on Serial Monitor button.
Sending downlink from TTS
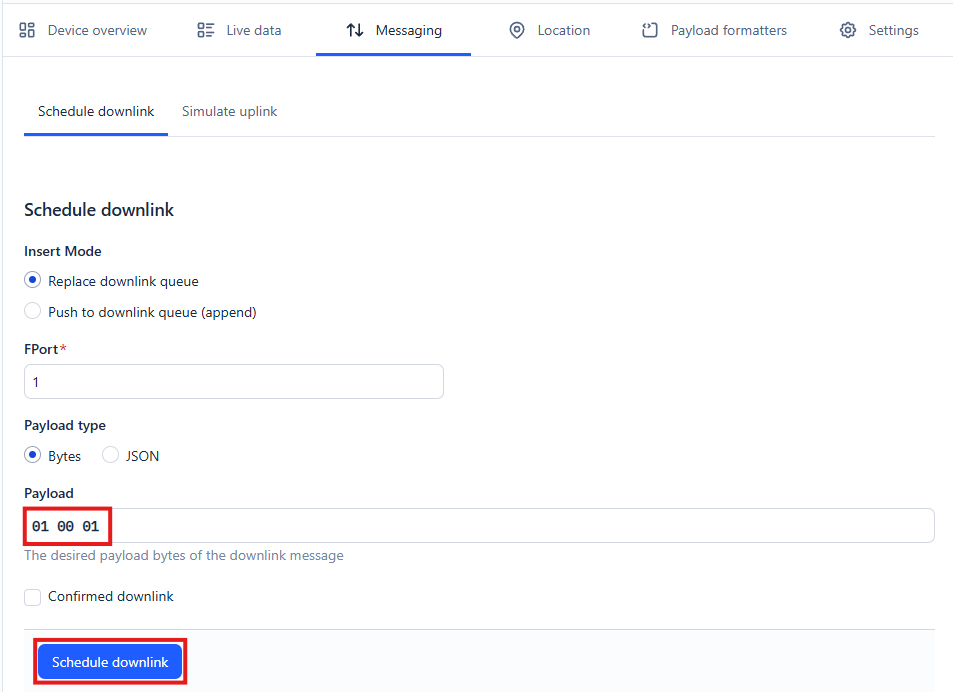
- In TTS -> Applications -> YourAppName -> YourEndDeviceName -> Messaging -> Downlink write 010001 to Payload field (channel 01, type 00 (Digital Input), value 01).
- Click on button Schedule downlink.
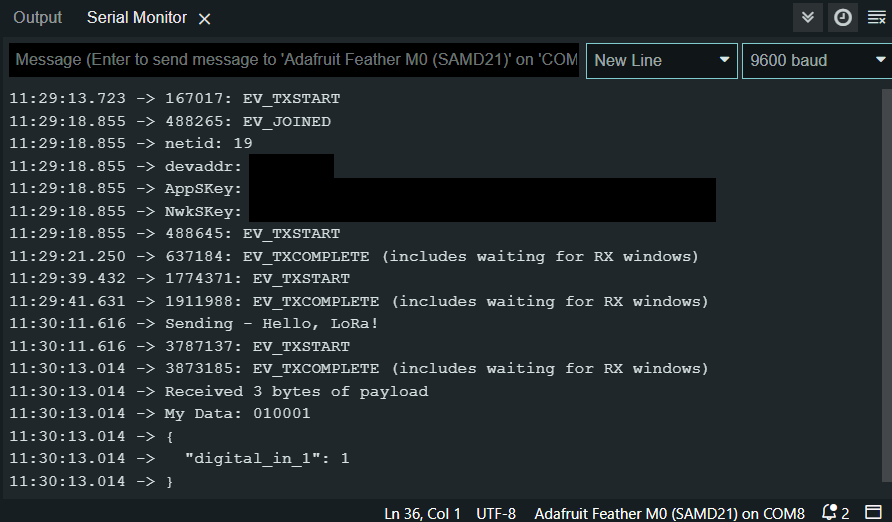
- After sending the uplink and receiving the downlink by Feather, you should see the following in Serial Monitor:
Sending downlinks in a different way
If you want to send downlinks in a different way, continue with the following tutorials: