| TTN version: | TTNv3 / TTS SANDBOX |
| Frequency: | Europe 863-870 MHz (SF9 for RX2 – recommended) |
| Activation: | OTAA |
| Device Class: | Class A |
| LoRaWAN: | 1.0.4 |
| Last revision: | December 14, 2024 |
WM1110 Dev Kit is based on Wio-WM1110 Wireless Module, integrates Semtech’s LoRa® transceiver and a multi-purpose radio front-end for geolocation. The LoRa® transceiver provides low-power, high-sensitivity network coverage, while GNSS (GPS/Beidou) and Wi-Fi scanning offer all-round location coverage. While also providing connectivity options for a variety of peripherals. See complete specification here.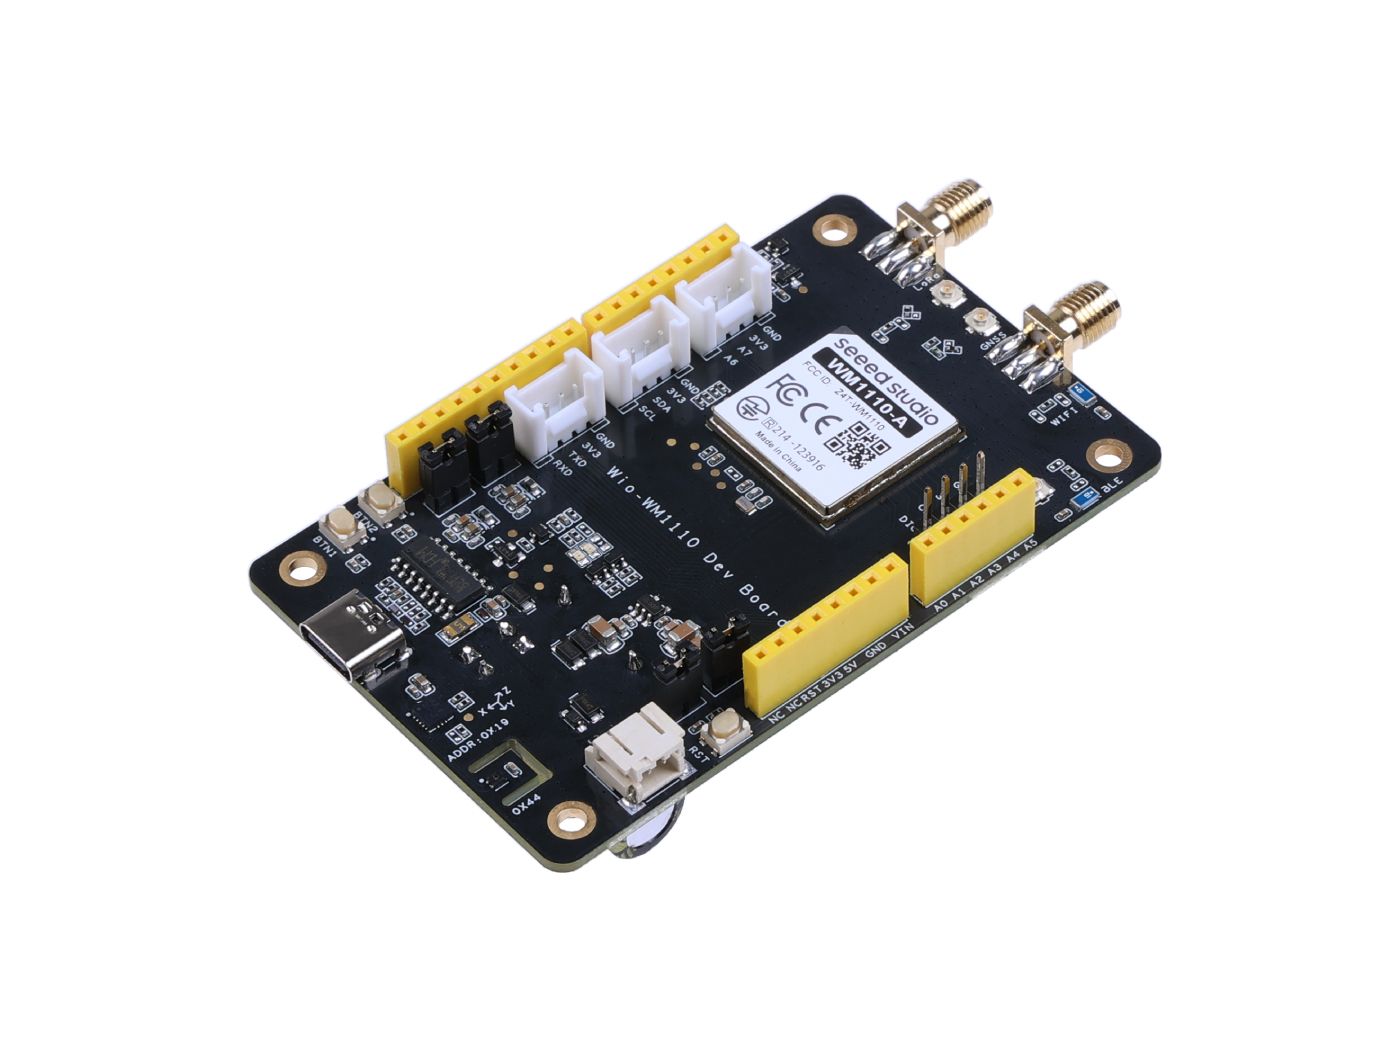
Prepare
- Wio-WM1110 Dev Kit
- PC + USB cable Type-C
- J-Link Debug Programmer
Get Started with Wio-WM1110 Dev Kit
- Follow the instructions provided on this website: Get Started with Wio-WM1110 Dev Kit and try the first tutorial: Running a First Test
- If you get the error “.text section is larger than specified size” or “.rodata section is larger than specified size” when running Build and Run, follow the fix below.
- To get LoRaWAN 1.0.4 up and running, follow the instructions below.
Section is larger than specified size – error fix
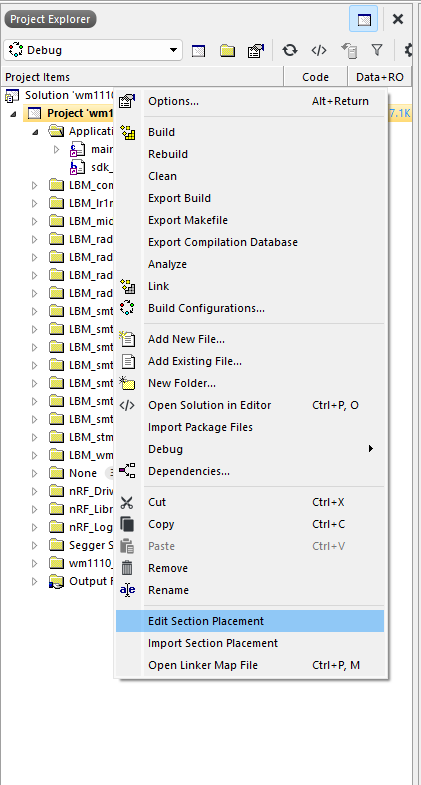
- Right-click on the project name and select Edit Section Placement.
- Change line
<ProgramSection alignment="4" load="Yes" name=".text" size="0x4" />
to
<ProgramSection alignment="4" load="Yes" name=".text" /> - Change line
<ProgramSection alignment="4" load="Yes" name=".rodata" size="0x4" />
to
<ProgramSection alignment="4" load="Yes" name=".rodata" /> - Save the changes and run Build and Run again.
Activation
Over The Air Activation (OTAA) – the most secure and recommended activation method for end devices. Devices perform a join procedure with the network, during which a dynamic device address is assigned and security keys are negotiated with the device.
Activation By Personalization (ABP) – requires hardcoding the device address as well as the security keys in the device. ABP is less secure than OTAA and also has the downside that devices can not switch network providers without manually changing keys in the device.
See the documentation for more information on activation.
Over The Air Activation (OTAA)
Add Wio-WM1110 Dev Kit into The Things Stack
- Create an account on The Things Network if you don’t have one.
- Login on The Things Network.
- Click on your username and choose Console.
- Select a network cluster.
Add application
- Go to applications.
- Click on button + Add application.
- Write something into Application ID.
- Click on button Create application.
Add end device
- In your application click on button + Register end device.
- Input Method – Choose Enter end device specifics manually.
- Frequency plan – Europe 863-870 MHz (SF9 for RX2 – recommended)
- LoRaWAN version – LoRaWAN Specification 1.0.4
- Regional Parameters version – RP002 Regional Parameters 1.0.4
- Click on Show advanced activation, LoRaWAN class and cluster settings
- Activation mode – Over the air activation (OTAA)
- Additional LoRaWAN class capabilities – None (class A only)
- Deselect – Use network’s default MAC settings
- Rx2 data rate = 3
- Rx2 frequency = 869,525 MHz
- JoinEUI – 0000000000000000
- Click on Confirm.
- DevEUI – Generate
- AppKey – Generate
- End device ID – here you can name your device
- After registration – View registered end device
- Click on button Register end device
- Click on Settings
- Network layer – Expand
- Click on Advanced MAC settings
- Desired Rx1 delay = 1
- Rx1 data rate offset = 0
- Add Frequency = 868100000
- Add Frequency = 868300000
- Add Frequency = 868500000
- Add Frequency = 867100000
- Add Frequency = 867300000
- Add Frequency = 867500000
- Add Frequency = 867700000
- Add Frequency = 867900000
- Adaptive data rate (ADR) – Dynamic mode
- Click on button Save changes
Sending “Hello LoRa!” to TTS
- In TTS -> Applications -> YourAppName -> YourEndDeviceName -> Payload formatters -> Uplink change Formatter type to Custom Javascript formatter and to Formatter code copy and paste code bellow:
function Decoder(bytes, port) {
   return {
          mydata: String.fromCharCode.apply(null, bytes) // Decode plain text
   };
}
- Save changes
- Open file located at …\nRF5_SDK_17.1.0_ddde560\examples\peripheral\Seeed_Wio_WM1110_Dev_Board\apps\common\lorawan_key_config.h
- Replace LORAWAN_DEVICE_EUI, LORAWAN_JOIN_EUI and LORAWAN_APP_KEY with keys in TTS. Keys are in TTS -> Applications -> YourAppName -> YourEndDeviceName -> Activation information.
- In the SEGGER Embedded Studio File -> Open Solution… -> …\nRF5_SDK_17.1.0_ddde560\examples\peripheral\Seeed_Wio_WM1110_Dev_Board-master\pca10056\blank\ses_lorawan -> open wm1110_dev_kit_pca10056.emProject
- Edit Section Placement as discussed in section above “Section is larger than specified size – error fix“.
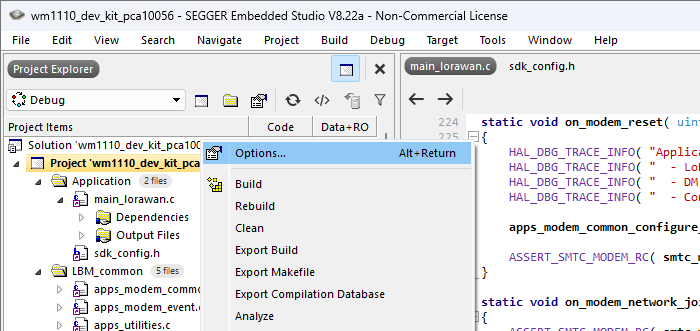
- Right-click on the project name and select Options.
- In Code -> Library -> Library I/O change None to RTT.
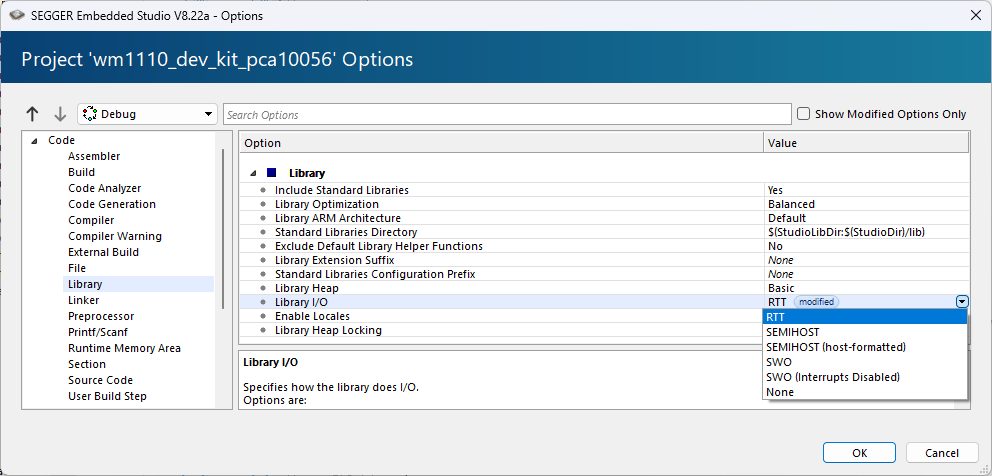
- Click OK.
- In main_lorawan.c replace the
static void on_modem_alarm( void )function with the new function below:static void on_modem_alarm( void ) { uint8_t app_data_size = 0; // Encode "Hello LoRa" into the app_data_buffer const char* message = "Hello LoRa"; app_data_size = strlen(message); // Get the length of the message memcpy(app_data_buffer, message, app_data_size); // Copy message into buffer // Send the frame send_frame(app_data_buffer, app_data_size, LORAWAN_CONFIRMED_MSG_ON); // Schedule next packet transmission ASSERT_SMTC_MODEM_RC(smtc_modem_alarm_start_timer(APP_TX_DUTYCYCLE)); } - Save changes
- Click on Build -> Compile main_lorawan.c
- Click on Target -> Connect J-Link
- Click on Build -> Build and Run
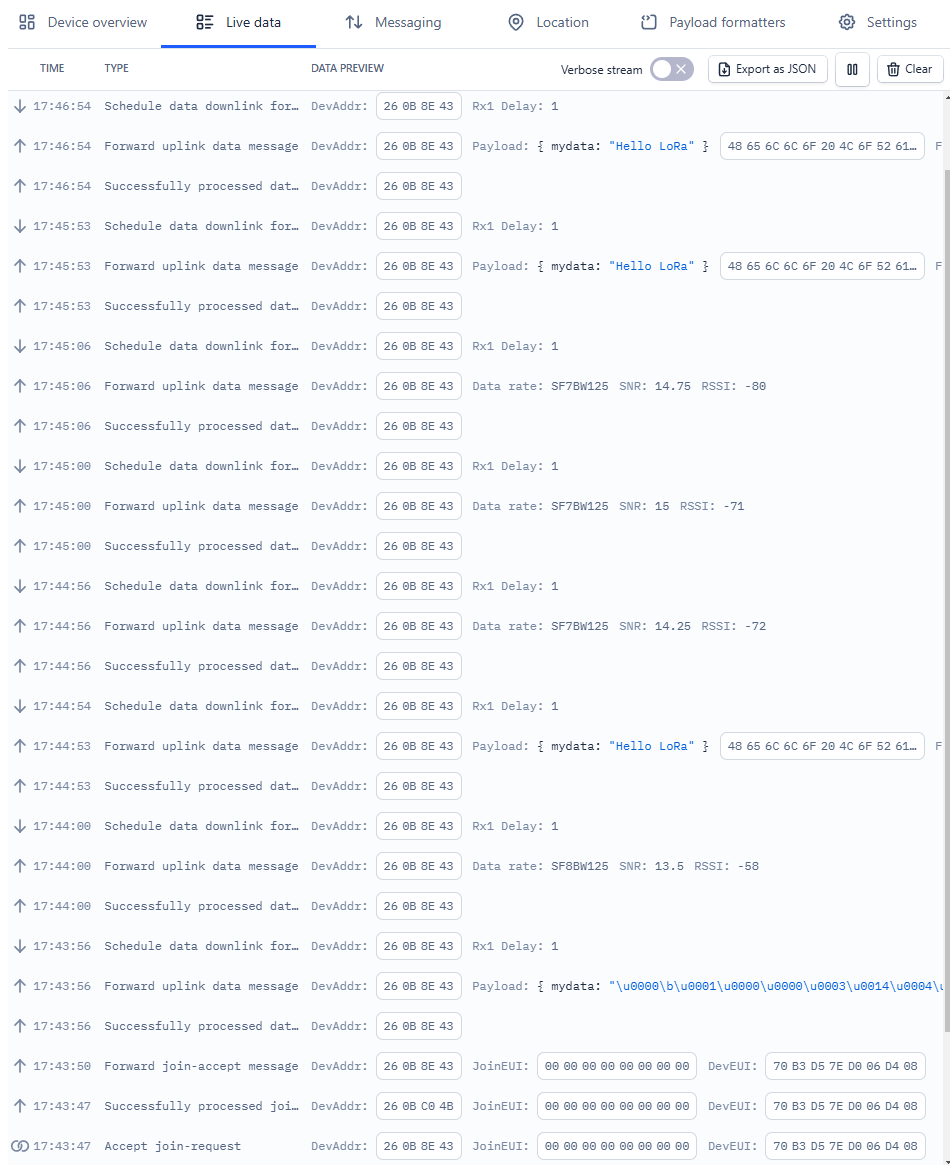
- In TTS -> Applications -> YourAppName -> YourEndDeviceName -> Live data you should every minute see this:
